DECISIONS, DECISIONS... WELL YOU GET THE POINT

120630-N-PO203-241
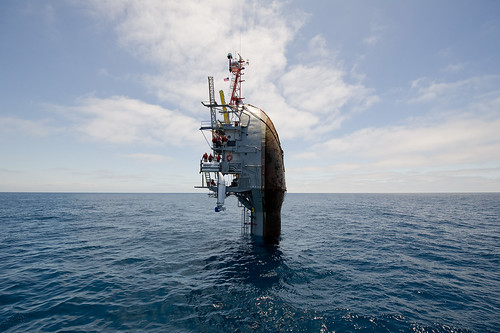
FLIP celebrating 50 years of operations by "flipping."
As photographers we have to make decisions and choices all of the time. Decisions such as camera and lens choice, f-stop and shutter speed, white balance, RAW or JPEG and a whole host of other things that go into making pictures.

Admit it, this is what you were thinking when you read the title, right?

And you would be right that for 90% of my assignments these are the biggest photographic decisions I make. But they are certainly not the toughest decisions. Given time and experience those decisions start to become second nature. The toughest decisions I have to make is where I'm going to photograph from.

Two assignments come to mind, but there have been many others over the years.


The first was an assignment to photograph the Navy's Floating Instrument Platform (FLIP) off the coast of San Diego, Calif., where I was given the choice between riding aboard FLIP or riding aboard a tug carrying media and VIPs. My first instinct was to ride aboard FLIP because that would be the cool thing to do. Very few people get that opportunity and it's something I've wanted to do since I started working at the Office of Naval Research. But deep down I knew that I needed to get photos and video of FLIP, well flipping, and that would not have been possible if I were aboard.
131106-N-PO203-226
It would not have been possible to capture this photograph if I choose to ride aboard. the best case would be that I could do both, but that is not always possible.
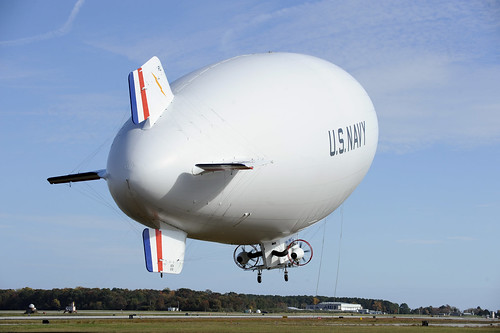
Then just recently I was assigned to photograph the Navy's only manned airship, or blimp, located at Naval Air Station Patuxent River, Md. Like FLIP, I've wanted to ride in this for some time and thought I would finally get the opportunity. But again I had to make a tough decision; am I going to get the best photos of the blimp from inside the blimp?  And like FLIP, I wanted to be aboard because that would be a very cool thing to do, but I knew that the best chance to photograph the blimp was to stay on the ground.

We make photographic decisions all the time, but the easy ones really are camera and lens, f-stop and shutter speed and all those other things you thought really mattered.

When I reflect on these two assignments, I know I made the right decisions and the images speak for themselves. In the case of FLIP, the video has been used by Discovery Channel, National Geographic and others and the photos continue to get published even one year later, most recently by the weather channel.

Navy Airship by John F. Williams on 500px.com
Photo of the Navy's airship that has been added to my portfolio on 500px.
Too soon to tell if the blimp photos will take off, but I'm very happy with the results and even used one in my portfolio. That's when the right decision pays off.

So is there ever a way to be in two places at one time? You might have noticed if you watched the FLIP video that there is onboard footage shot as FLIP transitions from the horizontal to vertical position. I did have the opportunity to mount a GoPro camera aboard and then coordinated with an on board scientist to trigger the camera just before operations began. He came through which proves that it is possible to be in two places at once, virtually at least.

You can also use a remote trigger on a second camera if you are close enough. If you are too far away to trigger a remote, then set the camera's timer to fire a frame at certain intervals. Who knows, you may get lucky as I did when I set a GoPro to shoot one frame every 30 seconds during a satellite launch in Kodiak, Alaska. I was three miles away when the image was made.
Two places at one time. GoPro camera allows me to capture launch while I'm three miles away with a 600mm.


INSTAGRAM - IT'S HIP TO BE SQUARE

My first Instagram photo. It would be 17 months until I posted again. #CellPhone #Filter #Frame
I admit I'm late to the Instagram party and think I've figured out why.

It wasn't because I don't dig the square format, I do. I don't mind filters and frames don't scare me.

And it wasn't the fact that four of the top ten followed accounts are either Kardasians or Jenners, half sisters to the Kardasians, female pop stars Beyonce, Rhianna and Taylor Swift, then Justin Beiber and finally Ariana Grande, someone I've never heard off. *

I think the real reason I was late is that I could never choose a side in the debate about what type of photos get posted to the site.

This photo was taken with a FujiX100s, processed in Instagram. #Camera #Filter
Not the photograph's genre, but do you post photos taken with a professional DSLR camera and post processed, or as the instant in Instagram suggests, do you post photos taken with a mobile device only. Don't think that is a hot topic? A quick search of the Internet will open your eyes. **

I joined the service and posted my first photo taken with my cell phone on April 11, 2012. The next photo taken 17 months later (yes almost a year-and-a-half later), again with my cell phone, came on November 23, 2013.

Then for reasons I can't explain, the next 11 photos, the last of which was posted on December 31, were all re purposed photographs taken with either a DSLR or my Fuji X100s and post processed.

Then came a bit of self examination. Is this how I wanted to use Instagram? Did I want to join photographers that shared photos this way. After all I reasoned that I'm already sharing my camera photos on Flickr and additionally sharing my favorites on 500px.

The start of a New Year and the start of becoming a regular Instagram contributor. #CellPhone #NoFilter
So for my next two photos I returned to using my cell phone. The first of these taken on January 1st while covering the Mummers Parade in Philadelphia was a disaster for several reasons, mostly due to my cell phone and a crashing app. For the other reason you can read about in a previous blog post.

The most recent image before I started writing this post was taken again with my cell phone on January 9th, and is of a donut. More typical of photos on Instagram? Now it was a maple glazed bourbon bacon donut, but was I now fully committed to using only a cell phone and was this how I was going to start off the New Year as an Instagramer?

Finally if I told you I just upgraded to a Samsung Galaxy S4then you know I've answered my own question. Yes, I'm going to only post photos taken with my cell phone. Does that make me an Instagram purest? Does anyone really care? After all I only have 12 followers and only posted 15 photos in nearly two years.

Final photo before this blog post. #CellPhone #NoFilter
Final photo before this blog post, but not the last. #CellPhone #NoFilter
I enjoy seeing creative photography, so if I see a cool photo on Instagram that clearly was taken with a DSLR it really doesn't matter to me. And I won't take the radical move of unfollowing these Instagram "impostors" either. Just know that if you post in this fashion there is a Hipster with an iPhone somewhere shedding a tear.

* The 10 Most Followed People on Inastagram: Should You Follow Them Too? By Joshua Lockhart.
** Should You Post Photos on Instagram that Were Shoot on a Digital SLR? By Dan Havlik.

HEADING OUT TO PHOTOGRAPH IN THE STORM

Snow showers in Valley Forge, Pa. The dark background gives the contrast needed for the snow to stand out.
Snow showers in Valley Forge, Pa. The dark background gives the contrast needed for the snow to stand out.  1/25 @ f7.0, ISO 400.
What is your first thought when you hear a forecast calling for snow? If your thoughts turn to photography, then this blog post is for you. And if you are still with me, then hopefully the five suggestions below will help you capture some unique photographs.

This post is not about capturing a beautiful snow scene after the snow has stopped, it's all about capturing the scene while it is still snowing. In fact, the heavier the snow, the better the effect will be and you will come away with something different and different is a good thing when it comes to photography.

Slow shutter speed caused the snow to streak.
Slow shutter speed caused the snow to streak. 1/5 @ f2.8, ISO 200.
1. Before anything, be sure to protect yourself and your gear. No photograph is worth destroying your camera gear or putting yourself in harms way. Most cameras today are weather sealed, but if it is really coming down you might want to protect gear with a rain jacket. Something like a Kata Rain Cover on the higher priced side or an OP/TECH Rainsleeve (2-Pack) on the lower priced end will work. Of course so will a large plastic sandwich bag.

2. Snow, especially snow showers will play havoc with your focus so set your camera to manual focus.

3. Select a scene with a dark background. The whole point of photographing while it is still snowing is so that the snow will be visible in the photograph and a dark background will give you the contrast needed for the snow to be a prominent feature of the photograph.

Same scene as above but the faster shutter speed gives a very different look.
Same scene as above but the faster shutter speed gives a very different look. 1/60 @ f2.8, ISO 200.
4. Choose the correct shutter speed to achieve the effect you want. A slow shutter speed will cause the snow to streak and give the scene a soft painterly effect. Too slow though and you might lose the snow altogether. Use a fast shutter speed to freeze the snowflakes and you will achieve a whole new effect, almost like adding a noise filter. Of course, I'm not telling you anything you don't know, however, the point is to experiment and find just the right look.

While the slow shutter speed adds nice streaking snow, its not readily apparent because of the lighter background.
While the slow shutter speed adds nice streaking snow, it is not readily apparent because of the lighter background. 1/30 @ f5.6, ISO 200.
5. Be aware of your depth of field and how it affects the scene. A shallow depth of field will enhance the effect of your shutter speed selection. Be careful using a deep depth of field as you might with most landscape scenes since in this case having everything in sharp focus may actually block the scene, especially in heavy snow.

So instead of just heading to the grocery store for bread and milk the next time the forecast calls for snow, get your camera gear ready and plan on heading to your favorite landscape or urban location.

After that, experiment and let your creativeness come through.

NEW YEAR'S DAY PHOTO FAIL

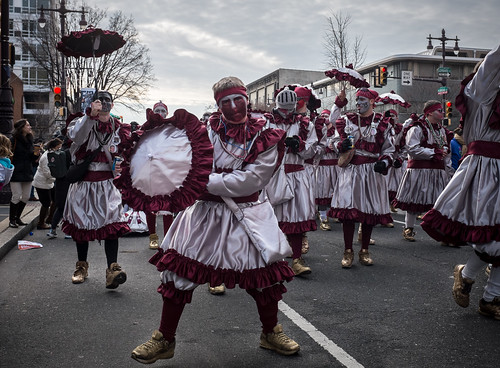
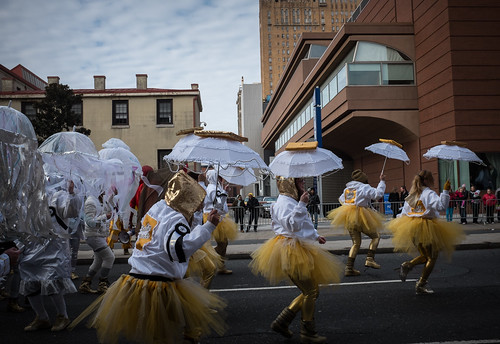
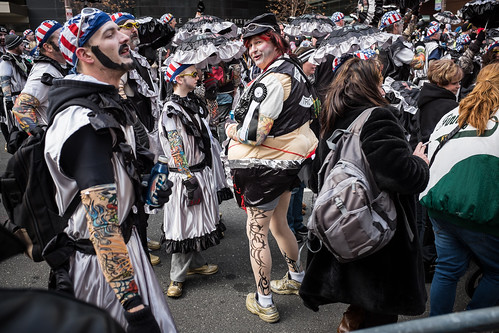
2014 Mummers Parade
"Oh, Dem Golden Slippers" is both a signature song and signature footwear worn by Mummers during the annual parade held on New Year's Day in Philadelphia.
There are days when you just don't have it. Even with the best intentions you head out with your camera and... nothing. All photographers face this and most of the time you just chalk it up to experience and move on.

Then there are those days when you are shooting and think to yourself that you are nailing it only to discover later that not only didn't you nail the shot, but you didn't really nail ANY shots. That is true disappointment and the place I found myself on New Year's Day.

It was with great excitement that on January 1st, 2014, I headed to Center City Philadelphia to photograph the 114th Mummers Parade. I've had a lot of fun in the second half of 2013 shooting with my Fujifilm X100S and photographing the Mummers was going to be a continuation of this and a great start to 2014, or so I thought.

Goodtime Lobster Club
In this photo of the Goodtime Lobster Club I came close to capturing the Mummer Strut that is a staple of the Comics divisions.
Just some quick background on the Mummers for those of you who haven't had the pleasure. Some compare the Mummers Parade to Mardi Gras in New Orleans, but that really doesn't do it justice or tell the whole story, in fact the parade itself predates Mardi Gras becoming official in 1900, but traces its roots back to the mid-17th century and is believed to be the oldest "folk" festival in the country. It is a party to be sure, but participants spend all year preparing props and costumes in order to welcome in the new year.

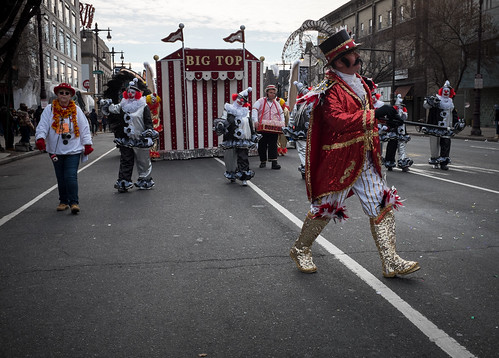
Fralinger String Band and the Circus Comes to Clown.
I photographed the Fralinger String Band as I worked my way along the parade route. Away from the performance areas you are not limited to shooting from the sidewalk and can venture into the street.
The parade consists of local clubs competing in one of four categories; comics (including wench brigades), fancies and probably the most well known, string bands and fancy brigades whose elaborate props and costumes can cost upwards of $10,000.

And even though I lived in and around Philadelphia my entire life, this was the first Mummers Parade I attended. I've watched on TV and thought about going in the past, but this year I was going to make it happen and I was determined to get some great photos.

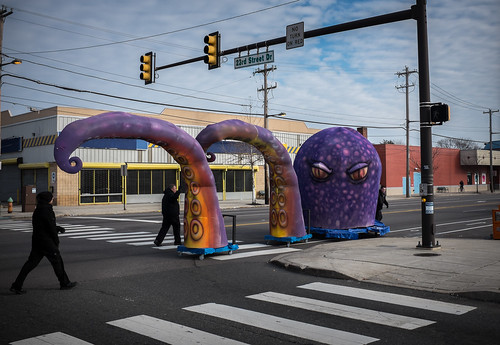
Members of the South Philly String Band move props up Oregon Ave.
Members of the South Philly String Band move props up Oregon Ave. These were the first photos I took during the day and thought I was off to a good start. I was close to getting the right shot, but just seemed to be a bit off.
I thought I was off to a great start as I was driving downtown and upon exiting at Passyunk Avenue I saw Mummers wheeling props down Oregon Ave, still hours away from when they would march up Broad Street. So I quickly drove ahead and found parking. I shot from two different locations as the South Philly String Band wheeled their props, including parts of a pirate ship and a giant octopus, down the street to the start of the parade. This was going to be a fun day I thought to myself.

This photo of Finnegan's NYB captures an individual, but fails to capture the excitement of the entire group.
I found parking as close to Broad Street as I could and headed off. The parade essentially takes place on a one and half mile route between Washington Avenue and City Hall, on a section of Broad Street known as the Avenue of the Arts. In that span there are several locations that are designated as performance areas and while they can get a little crowded, most of the stretch offers plenty of chances to get up close and personnel. My goal was to capture moments that didn't necessarily involve the performances so I roamed up and down Broad Street shooting from both sides of the street and in some cases from in the street.

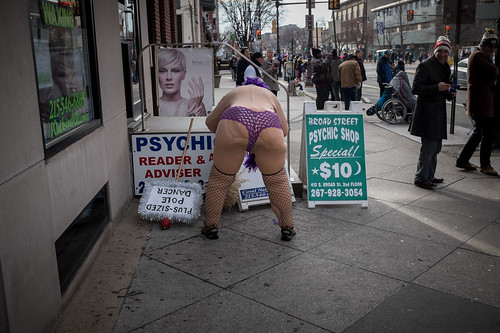
I searched and scanned for interesting characters, faces, antics, anything that would convey the feeling of Mummery.

Froggy Carr Wench Brigade perform "Frogs Under the Sea."
In this photo of the Froggy Carr Wench Brigade performing "Frogs Under the Sea" I captured the color but failed to really capture any movement or celebration.
So all this pageantry of color, movement, celebration, costumes and unique characters, was all taking place in front of my camera and I was clicking away sure that I was capturing some really cool images. Yet for some reason what I was seeing with my eyes and what I was capturing just didn't add up. Sometimes I seemed a second off, sometimes I needed to be wider or tighter and sometimes I just missed the key moment all together.

That would have been fine if I had realized it at the time and made the adjustments. Not a huge deal because I was shooting for myself and not on assignment. For a professional photographer on assignment, even if you don't have it, you better find it quick, because if you return too often without it, then you will find yourself looking for another job. On this day even if I didn't get the one shot I was looking for, I did get some photos that may not be as bad as I first thought, and probably most important, I had a wonderful time.

Mummers Parade
I was prepared to capture more of this type of behind the parade scenes but ended up focusing more on the parade itself and in the end maybe didn't focus on anything.
I've already been out shooting again and I have several assignments this week to redeem myself and get 2014 off to the proper photographic start, but my thoughts are already on Jan. 1, 2015, and the 115th Mummers Parade.

Not that I'm in a hurry.

AS SCENE FROM A TRAIN - FIVE TIPS FOR BETTER PHOTOGRAPHS

Photographing an urban scene like this one as the train left Central Station in Montreal offers a different viewpoint of the city. Fujifilm X100S, 1/200 @ f5.6, ISO 200.

Photographing an urban scene like this one as the train left Central Station in Montreal offers a different viewpoint of the city. Fujifilm X100S, 1/200 @ f5.6, ISO 200.

Traveling by train can be a wonderful experience, sitting comfortably and watching as the world passes by just outside your window. I suppose if you commute daily by train you might not see it as some wonderful experience, however, whether the train you are on is traveling through a beautiful countryside or the forgotten parts of a city, there is no reason why you shouldn't be able to take out your camera and make some amazing photographs.

We have all seen photographs out of airplane windows. Instagram anyone? Perhaps they are a bit cliche, although I actually don't mind them. Less often though do you see photos taken from a train and that's a shame. Maybe it is because more people fly, I don't know, but the opportunities to capture unique views from a train are endless. And many times it is not even possible to tell from the photograph that it was taken through a window while traveling upwards of 60 miles per hour.

Taking advantage of the stopped train while waiting to cross the border from Canada into the United States allowed me some extra time to compose this shot which would have been difficult with the train moving due to the strong back light. Fujifilm X…

Taking advantage of the stopped train while waiting to cross the border from Canada into the United States allowed me some extra time to compose this shot which would have been difficult with the train moving due to the strong back light. Fujifilm X100S,  1/950 @ f5.6, ISO 400.

So what do you photograph? Think about the difference between trains and cars, besides the fact that trains are on rails and cars are on the road, but what does that offer you visually. If you think about it, roads generally pass by the front of buildings and houses, whereas trains travel behind, which makes it possible to capture a unique perspective. If you are out west or up north, it can be about beautiful landscapes, but most trains travel through urban and industrial areas as well so you see the back side of the city or urban landscape. Take advantage of both and you will be surprised at what you capture.

Notice how the foreground is a blurred. I still think it adds some interest. Fujifilm X100S, 1/500 @ f5.6, ISO 200.

Notice how the foreground is a blurred. I still think it adds some interest. Fujifilm X100S, 1/500 @ f5.6, ISO 200.

Before you break out your camera on the next trip from Washington, D.C., to Philadelphia or beyond, let me offer some tips to help you start making beautiful images from the comfort of you train seat. And you barely have to put down your drink to do it.

Five Tips to make better photographs during your next train journey:

1. Pick a good seat. It might seem obvious, but you really should choose a window seat, otherwise, you better get to know the person you are sitting with very well. Somewhat joking, but there a few ways to ensure you will get a window seat and a good one at that. Use the red cap or a similar service even when you don't need assistance with your luggage because they will get you on the train before everyone else and that is well worth a few dollars. Boarding early also gives you the option to pick a seat with the cleanest, least scratched window. Finally, not all window seats are created equal, so make sure you get one that is more or less centered on a window.

I selected the left side of the Amtrak Adirondack train from New York to Montreal because I knew the Hudson River would be out my window during most of the trip. The ice was a bonus. Fujifilm X100S, 1/1250 @ f2.8, ISO 400.

I selected the left side of the Amtrak Adirondack train from New York to Montreal because I knew the Hudson River would be out my window during most of the trip. The ice was a bonus. Fujifilm X100S, 1/1250 @ f2.8, ISO 400.

2.Select the side of the train that will afford you the best views. If it is not a route you are familiar with, then a little research will go a long way. Google maps do show train tracks. Another consideration when selecting which side to sit will be the direction of light. Shooting into the sun can create some interesting photos, but remember that you are shooting through a window so the sun glare and reflection may not allow for photographs. Compare it to sun glare on a dirty windshield, it is the same thing.

Downtown Albany, New York, as the sun goes down. I like the empty parking lot and elevated shooting position. A view that would be difficult if not for riding on the train. Fujifilm X100S, 1/1250 @ f2.8, ISO 400.

Downtown Albany, New York, as the sun goes down. I like the empty parking lot and elevated shooting position. A view that would be difficult if not for riding on the train. Fujifilm X100S, 1/1250 @ f2.8, ISO 400.

3. Pay attention to your aperture. Selecting a wide aperture, f 2.0 - f 5.6, will limit the effects of shooting through the window, similar to shooting through a fence. If you have the time and can do it safely, clean the window from the outside prior to boarding. Of course, you should check with train personnel before you do this just to be on the safe side. But at a minimum, wipe the inside of the window. You don't have to shoot wide open though because you do want some depth of field, but too much and you will be spending a lot of time cloning out spots caused by dirt on the window.

4. Shutter speed matters. Objects close to the train will blur even at relatively fast shutter speeds. If you are shooting objects in the distance without a foreground then you can get away with a slower shutter speed even on a fast-moving train. If a fast shutter speed is not possible or you are just looking to get more creative, then slow the shutter speed way down and blur the scene as you pass by. Instead of you panning with the camera, let the train do it for you. Think about this technique to photograph trees during the Fall.

Photographing the backside of the city. The slightly burred train structure at the right adds just enough context to let the viewer know that this photo is taken from a train. I like the industrial look and hints of color in this image. It can be ha…

Photographing the backside of the city. The slightly burred train structure at the right adds just enough context to let the viewer know that this photo is taken from a train. I like the industrial look and hints of color in this image. It can be hard to frame a shot while the train is traveling at 60 m.p.h. so take plenty of shots.  Fujifilm X100S, 1/160 @ f5.6, ISO 200.

5. Always be prepared to shoot and when possible try to anticipate what's coming up. Even when you are very familiar with the route, the view outside will pass by quickly so you need to keep your camera ready and as close to the window, without touching it, as possible. This might be a good time to mention that a wide angle lens works best, especially in a changing landscape. Fast moving trains make framing and shooting with long glass difficult. If the train is moving slowly or you are traveling the great plains, then this may not be a problem.

Take the time to shoot lots of pictures on your next rail journey and let the results surprise you and your friends. Besides, there is much more to see from a train window than from a plane window.

Check out Amtrak train routes and start planning your adventure today.