Ever since my trip to Arizona in December 2012, I've been thinking about another self-assigned photography trip, but with a busy work schedule, the time just slipped by.
During the ensuing years, many locations ran through my mind and as 2014 was drawing to a close, I finally decided that I would visit Yosemite National Park during the last week of February 2015. I started the research and planning the flights, hotels, etc., but again time passed and in January when I finally got around to actually making reservations, the trip just started falling apart, mostly due to lodging. The first lesson, commit early.
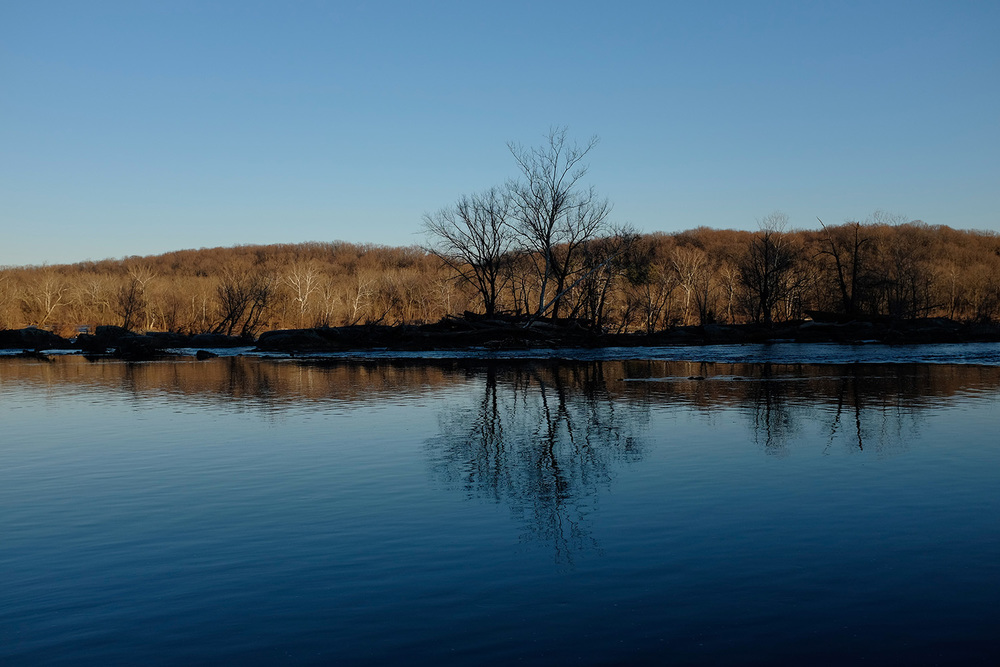
For a while, I figured that more time would pass before I launched into another adventure. However, I never quite removed the vacation days from my calendar and I just couldn't shake the notion that I wanted to get out and photograph. So again, I started thinking about possible locations and one place kept coming to mind - The Great Smoky Mountains National Park.

I visited the park last year while driving home from Memphis, but only spent the day, but knew then that I wanted to return. Fujifilm X100S, F5.6, 1/550 at ISO 400.
My current plan is to spend two nights in Townsend, Tennessee, one night in Gatlinburg, Tennessee, and one night in Boone, North Carolina, giving me close to four days of shooting. I plan on photographing Cades Cove, Tremont, and Newfound Gap. Unfortunately, popular locations such as Roaring Fork and Clingmans Dome might be out due to winter road closure although I am bringing snowshoes and could possibly hike in.
If you have been following the weather then you know that the East Coast has been experiencing extremely cold temperatures along with snow and ice. The Smokies are no different, so I've been monitoring two Twitter accounts, @GreatSmokyNPS and @SmokiesRoadsNPS, to keep up-to-date on road and park conditions. While most of the photographs I see while doing research were taken during the spring, I love photographing in the winter and, of course, photographing now will hopefully allow me to get images that are different from the rest.
That's the logistics part of the plan, so what about the gear.
Since I'll be driving to this location, I'm probably going a little heavy gear wise, plus I'll need to pack plenty of cold weather gear. And much of the gear I'm bringing is similar my Arizona trip, just updated models.
Cameras will consist of a Nikon D4S along with my Fujifilm X100S. For lenses, I'm bringing the Nikon 14-24mm, 24-70mm, 70-200mm and a 300 2.8. I'll also add a 2x teleconverter.
For a computer, storage and software, I'm using a Macbook Pro 15" with a LaCie Rugged 1 TB USB 3.0 Mini Disk Portable Hard Drive for backup. Software includes Photo Mechanic for ingest and captioning and Lightroom 5 and Photoshop CC (2014), to post-process the images. And various camera storage including CompactFlash cards ranging from 16 - 64GB and a 64GB XQD card.
I will also bring my iPad, mostly for two Apps that I rely on during travel. First is Sun Seeker, which provides sunrise and sunset times and also shows a map view of sun direction for each daylight hour and 3D views of the solar path. Second is The Weather Channel which comes in handy for planning each day.

Three screen shots of the Sun Seeker App available for the iPad or iPhone.
To support the camera's I'm bringing two tripods, a Bogen Model 3033X and a Gitzo Series 00 Carbon 6X with an Arca-Swiss Monoball Z1 ball head as well as a Gitzo monopod.
Rounding out the accessories will be a Nikon SB910 flash, SU 800, PocketWizard Plus (to use as a cable release), and a Zacuto Z-Finder Pro. And finally, something that I'm really excited to use on this trip, the Cokin Z Pro Series ND Graduated Filter Kit. I have not used anything other than a UV filter in front of my lenses since I started shooting digital in 1999. Recently for landscape work I've shot HDR and generally liked the results. What I didn't like was the extra steps along with the post processing time.
As with the Arizona trip, I will update this blog each day of the trip with photographs, lessons learned and how I used the camera gear to make it all happen. Following the trip, I'll write an in-depth post on the Cokin ND filters.