Nikon

A BRIEF ENCOUNTER WITH THE NIKON Z7 MIRRORLESS CAMERA

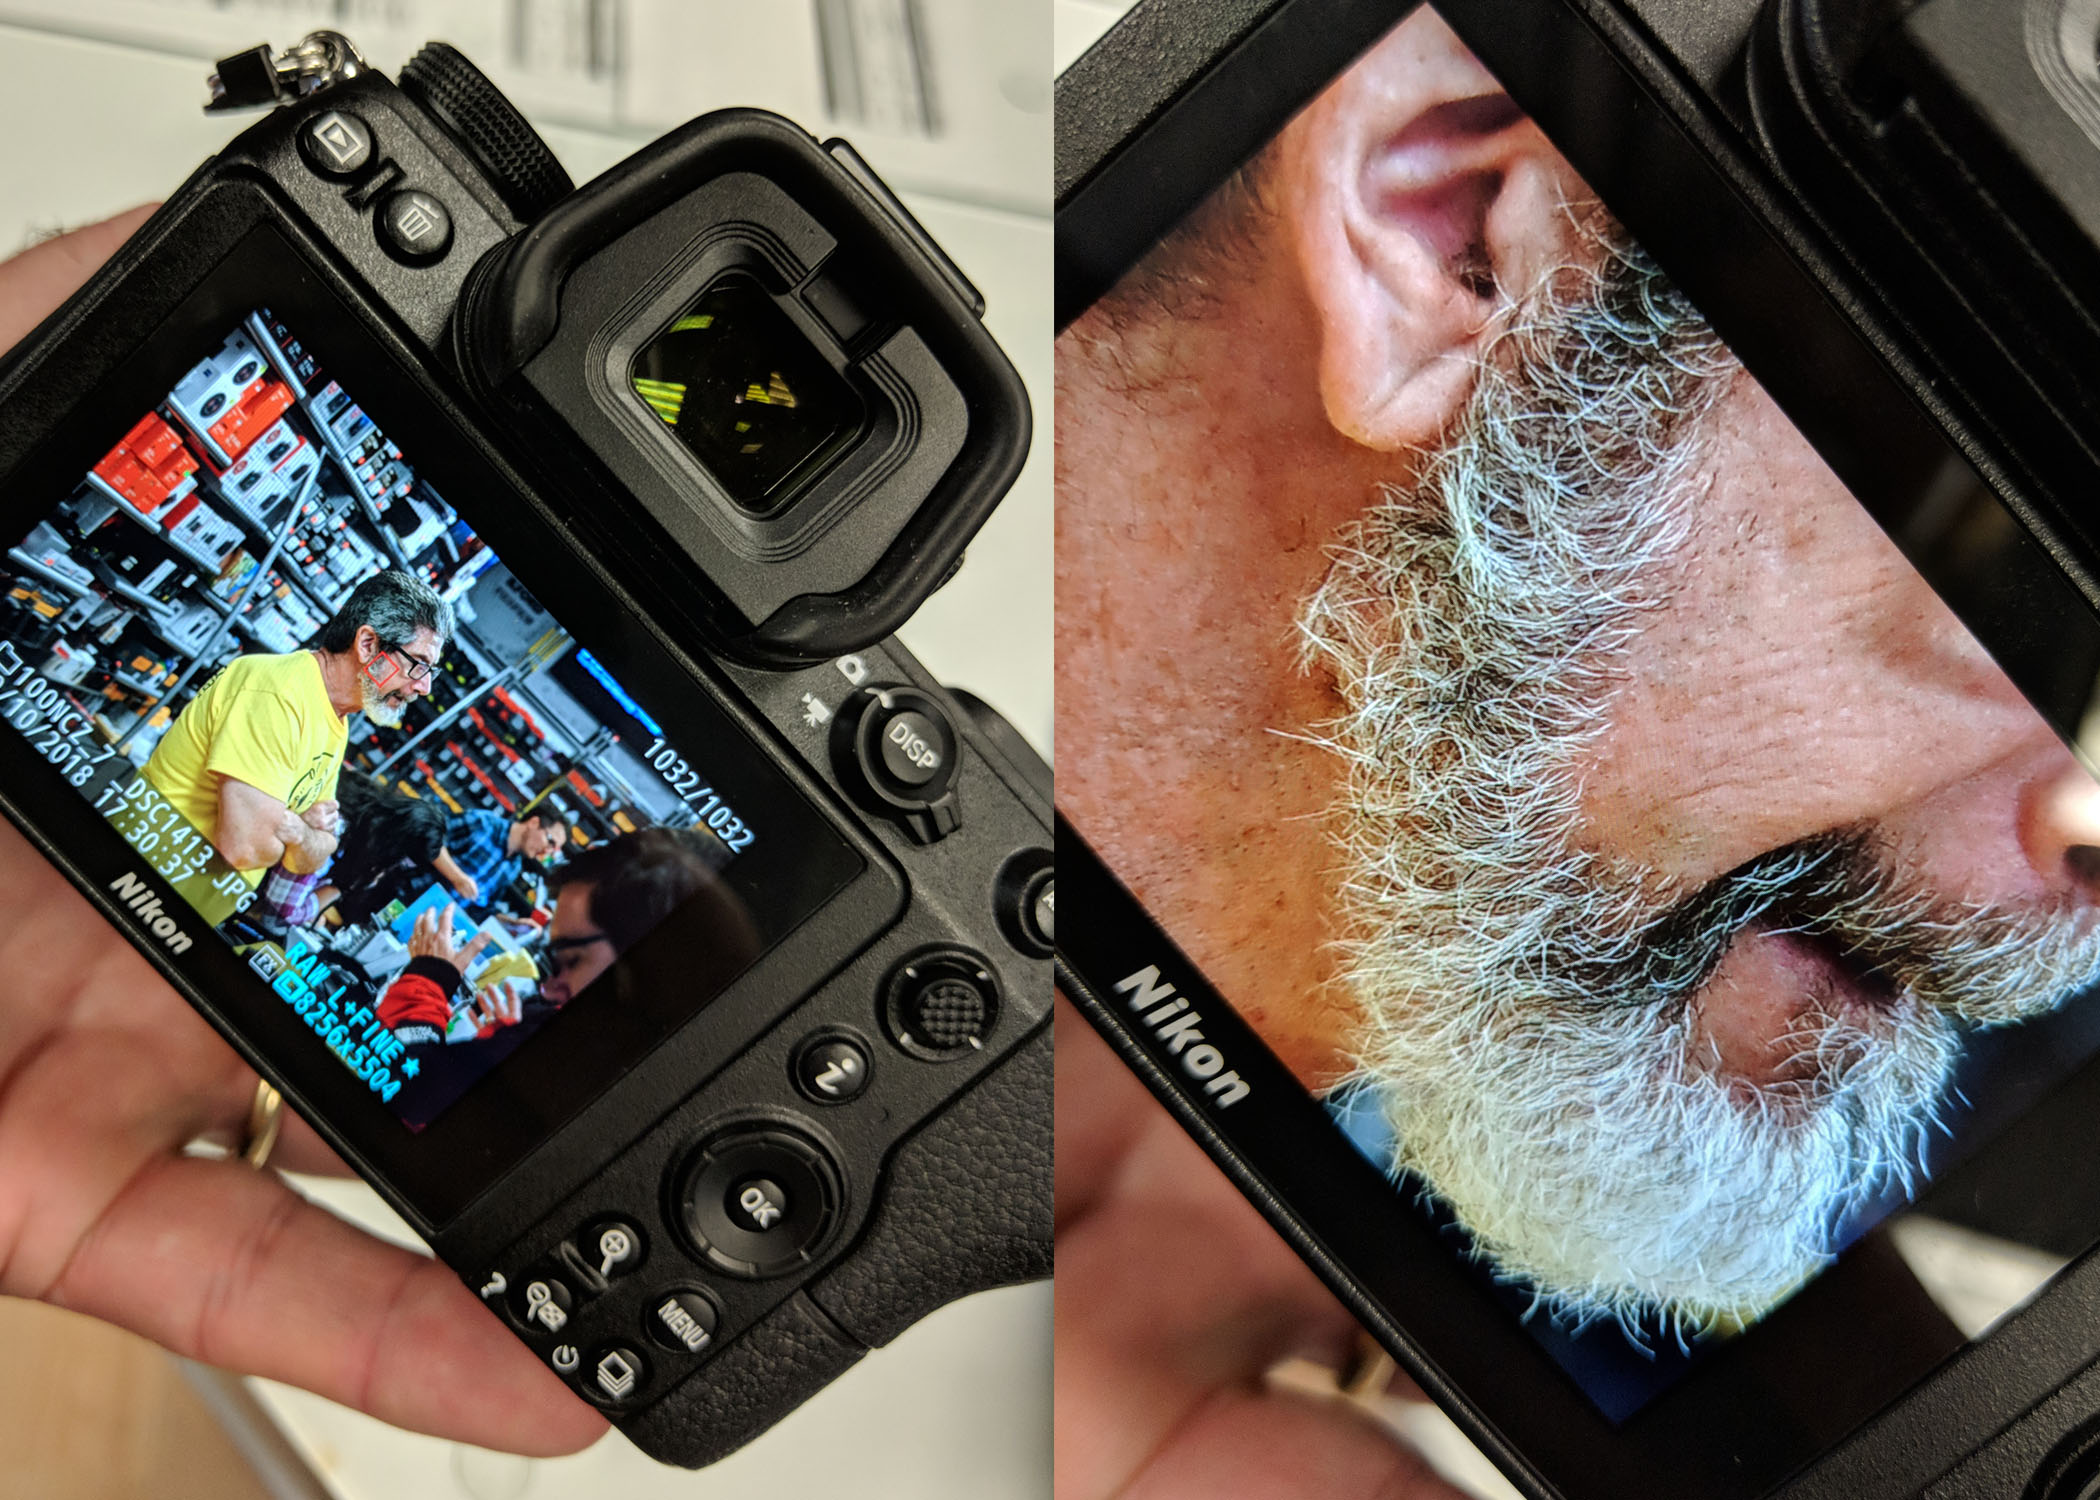
The Nikon Z7 with new 24-70mm f4.0 at District Camera launch event in Washington, D.C.

I wasn’t that excited when I first heard that Nikon was entering the mirrorless camera space. I was curious, for sure, but just wasn’t expecting too much.

I was disappointed before. Remember the Nikon 1 J1? Or, maybe the Coolpix? Decent cameras, however, I kept waiting for Nikon to release a small form factor camera that was capable of meeting my needs. Over the years I’ve watched as Sony, Fuji, Olympus, and Panasonic all released mirrorless cameras. Mirrorless cameras capable of providing professional results.

Finally, after giving up on a Nikon mirrorless, I purchased the Fujifilm X100S, followed by the Fujifilm X-Pro2, and have never looked back. I’ve written often about Fujifilm cameras on this Blog and provided many reasons why I love both the X100S and the X-Pro2.

However, to be fair, in my professional life, I never gave up on Nikon and currently shoot with a couple of Nikon D4Ss and all the associated pro lenses. As much as I loved my Fujifilm cameras for my personal photography, I was never comfortable enough to consider replacing the Nikon DSLRs at work.

When I was invited to a Nikon Z7 launch dealer event at District Camera in Washington, D.C., through Nikon Professional Services, I knew it was time to take a look. I have been watching and reading all the reviews following Nikon’s announcement a couple of week’s back and this would figured it would be foolish to pass on the chance to get a first-hand look.

Cutting to the chase, I think Nikon finally got it right. Even though I was only able to handle the camera for about a half hour, and not allowed to use my own XQD card (I tried), what I was able to see, amazed me. More importantly, I could instantly start to see how this camera would fit nicely into my existing system and production schedule.

I was not able to use my own XQD card or take any images with me to process, so I used my phone to photograph the display, left, and then I double-tapped the screen to zoom in.

The electronic viewfinder is bright, the touch-screen display is large and responsive, the buttons and menus are all familiar to Nikon users, and the 24-70mm f4.0 lens was tact sharp. This camera also feels right in the hand thanks to a great design and a nice beefy grip. But, what really impressed me, and probably sold me, was the FTZ adaptor which allows the seamless connection of existing F-mount lenses to the Z-mount on the body. That’s what would make it fit instantly into my workflow.

For years now I have been trying to find smaller and lighter equipment in an effort to make travel easier and take some strain off of my aging body. I just couldn’t compromise the end product, either with video or stills. With the Nikon Z7, I don’t think I have to.

ISN'T THAT THE SECRETARY OF THE NAVY?

Secretary of the Navy Richard V. Spencer talks with members of the Office of Naval Research STEM coordination office. Nikon D4S, 24-70mm, 1/160 @ f4.0, ISO 3200.

I pride myself on being a prepared photographer. Prepared for an assignment, prepared to make photographs and prepared to move those images when the assignment is complete. That doesn't mean mistakes don't happen or things always go as planned, but again, I like to think that I'm prepared to deal with those instances as well.

So perhaps I let my guard down a bit while covering the 5th USA Science & Engineering Festival at the Walter E. Washington Convention Center over the weekend. This event which has over 3000 exhibits and draws in excess of 350,000 people takes place every two years and I've covered all five during my time as the photographer for the Office of Naval Research (ONR).

Maybe it was because I was coming off a pretty large job in Panama City, Fla., and looking ahead to the largest maritime exposition in the United States, Sea Air and Space next week followed by an at-sea job at the end of the month, that I was not as focused as I should have been.

I got a little later start than I wanted to on Saturday, but still arrived at the convention center around 11:15 and was surprised by how crowded it already was. I made my way to the Department of Defense exhibit space and made contact with those I was supposed to photograph. The booth was a little uninspiring, but those manning it were enthusiastic and were doing their best to engage attendees. 

Nikon D4S, 70-200mm, 1/160 @ f3.2, ISO 3200.

My frustration was that despite a huge convention floor, the booth space I was concentrating on was located in a corner surrounded by other booths, making it bit of a choke point, and making clear shots difficult. For around an hour I tried to get some photos, any photos, of engagement with kids, or kids and parents, who wanted to learn about STEM opportunities with the Naval Research Enterprise but came up short.

It was during this time I found myself spending more time talking with friends and only half looking for photo opportunities. I noticed a member the ONR team talking with a casually dressed gentleman, but only lamented the fact that it wasn't a child. Then I noticed several of our team talking with the same person. At that point, I took a look to see if it was perhaps an executive or program officer from ONR. Satisfied that it wasn't, I went back to my conversation.

Well, thankfully I was interrupted by someone who pointed out that the gentleman was, in fact, the 76th Secretary of the Navy, completely alone, just taking in the Department of the Navy exhibits. I regrouped and immediately began making photographs, first with a 24-70mm and then switching to my second camera with the 70-200mm mounted to it.

A more traditional STEM image. Nikon D4S, 70-200mm, 1/160 @ f 2.8, ISO 3200.

Fortunately, the conversation lasted long enough for me to get several usable images. And just like that, I had my photo. Funny thing is that almost as soon as he left, I was able to make two more photos that featured more traditional scenes.

I stayed long enough to download and caption all my photos, transmit to DoD sites, upload to ONR's Flickr and Instagram accounts and email to our social media manager for posting to Facebook and Twitter.

Just another reminder to never take any assignment for granted and never take it lightly just because you covered it many times before or it's not as high profile as other assignments that are currently on your mind.

MAKING THE BEST OF WORLDWIDE PINHOLE DAY

Pinhole photo of a Saguaro cactus taken with a Nikon D4S. One-second exposure, aperture unknown.

Pinhole photo of a Saguaro cactus taken with a Nikon D4S. One-second exposure, aperture unknown.

I really enjoy pinhole photography and ever since I built a camera and took that first shot in 2013, I've made it a point to participate in the Worldwide Pinhole Photography Day (WPPD). This international event is held each year the last Sunday in April in order to promote and celebrate the art of pinhole photography.

Surrounded by digital in my full-time job, I enjoy the opportunity to produce an image on photographic paper using nothing more than a box with a tiny hole and some chemicals. It always provides a challenge and seeing a negative appear on paper as it sits in the developer, reminds me of excitement I felt the first time I stepped into a darkroom over 35 years ago.

So this year I was disappointed when I realized that due to an early Sunday flight to Tucson, Arizona, for an assignment, I would not be able to participate. After all, it would not be practical to bring my pinhole camera and chemicals with me. I briefly thought about pre-loading my camera and bringing it along, or maybe get up early and take a photo before my flight, but neither of these options excited me enough to do them.

During the flight, I thought about missing out on WPPD and that's when it hit me. What is a pinhole camera anyway? I realized I had everything with me in order to make one, a Nikon D4S with a body cap. One of the reasons I left so early from Washington, D.C., was so that I could arrive in Tucson early enough to spend some time in the Saguaro National Park before my assignment started on Monday. So I had the time and now I had an idea of what I would do.

The tools I used to make the hole in the camera's body cap.

The tools I used to make the hole in the camera's body cap.

After landing, I stopped at a local drug store and picked up a pack of sewing needles, a small roll of duck tape and a package of lighters. Total cost was $4.50. I secured a small pebble to the top of the needle using the duck tape and then after heating the tip with a lighter, I pushed it through the center of the body cap. It took a few tries, but really there was nothing more to it.

One big difference of course between this "pinhole camera" and mine is that I was able to see the results of my efforts on the digital display instantly and make adjustments until I had the proper exposure. Too easy.

It wasn't as much fun as previous years, but I can say that I participated in WPPD 2015, and that made it all worthwhile.

PHOTOGRAPHING THE GREAT SMOKIES - THE PLAN AND THE GEAR

Ever since my trip to Arizona in December 2012, I've been thinking about another self-assigned photography trip, but with a busy work schedule, the time just slipped by.

During the ensuing years, many locations ran through my mind and as 2014 was drawing to a close, I finally decided that I would visit Yosemite National Park during the last week of February 2015. I started the research and planning the flights, hotels, etc., but again time passed and in January when I finally got around to actually making reservations, the trip just started falling apart, mostly due to lodging. The first lesson, commit early.

For a while, I figured that more time would pass before I launched into another adventure. However, I never quite removed the vacation days from my calendar and I just couldn't shake the notion that I wanted to get out and photograph. So again, I started thinking about possible locations and one place kept coming to mind - The Great Smoky Mountains National Park.

I visited the park last year while driving home from Memphis, but only spent the day, but knew then that I wanted to return. Fujifilm X100S, F5.6, 1/550 at ISO 400

I visited the park last year while driving home from Memphis, but only spent the day, but knew then that I wanted to return. Fujifilm X100S, F5.6, 1/550 at ISO 400.

My current plan is to spend two nights in Townsend, Tennessee, one night in Gatlinburg, Tennessee, and one night in Boone, North Carolina, giving me close to four days of shooting. I plan on photographing Cades Cove, Tremont, and Newfound Gap. Unfortunately, popular locations such as Roaring Fork and Clingmans Dome might be out due to winter road closure although I am bringing snowshoes and could possibly hike in.

If you have been following the weather then you know that the East Coast has been experiencing extremely cold temperatures along with snow and ice. The Smokies are no different, so I've been monitoring two Twitter accounts, @GreatSmokyNPS and @SmokiesRoadsNPS, to keep up-to-date on road and park conditions. While most of the photographs I see while doing research were taken during the spring, I love photographing in the winter and, of course, photographing now will hopefully allow me to get images that are different from the rest.

That's the logistics part of the plan, so what about the gear.

Since I'll be driving to this location, I'm probably going a little heavy gear wise, plus I'll need to pack plenty of cold weather gear. And much of the gear I'm bringing is similar my Arizona trip, just updated models.

Cameras will consist of a Nikon D4S along with my Fujifilm X100S. For lenses, I'm bringing the Nikon 14-24mm, 24-70mm, 70-200mm and a 300 2.8. I'll also add a 2x teleconverter.

For a computer, storage and software, I'm using a Macbook Pro 15" with a LaCie Rugged 1 TB USB 3.0 Mini Disk Portable Hard Drive for backup. Software includes Photo Mechanic for ingest and captioning and Lightroom 5 and Photoshop CC (2014), to post-process the images. And various camera storage including CompactFlash cards ranging from 16 - 64GB and a 64GB XQD card.

I will also bring my iPad, mostly for two Apps that I rely on during travel. First is Sun Seeker, which provides sunrise and sunset times and also shows a map view of sun direction for each daylight hour and 3D views of the solar path. Second is The Weather Channel which comes in handy for planning each day. 

Three screen shots of the Sun Seeker app available for the iPad or iPhone.

Three screen shots of the Sun Seeker App available for the iPad or iPhone.

To support the camera's I'm bringing two tripods, a Bogen Model 3033X and a Gitzo Series 00 Carbon 6X with an Arca-Swiss Monoball Z1 ball head as well as a Gitzo monopod.

Rounding out the accessories will be a Nikon SB910 flash, SU 800, PocketWizard Plus (to use as a cable release), and a Zacuto Z-Finder Pro. And finally, something that I'm really excited to use on this trip, the Cokin Z Pro Series ND Graduated Filter Kit. I have not used anything other than a UV filter in front of my lenses since I started shooting digital in 1999. Recently for landscape work I've shot HDR and generally liked the results. What I didn't like was the extra steps along with the post processing time.

As with the Arizona trip, I will update this blog each day of the trip with photographs, lessons learned and how I used the camera gear to make it all happen. Following the trip, I'll write an in-depth post on the Cokin ND filters.

WHEN OPPORTUNITY KNOCKS, SHOOT - PHOTOGRAPHING THE SECOND AVENUE SUBWAY

Future 86th Street Station is part of the Second Avenue Subway project.
The future 86th Street Station is part of the Second Avenue Subway project in New York City.
As a photographer for the Office of Naval Research I often have the opportunity to photograph some pretty cool things. Most of the time it comes down to access. If you think about it, as photographers we are often provided access not available to the general public, so when an opportunity arises to photograph something unique, we take advantage of it.

And sometimes opportunities arise because we know the right person. That was the case recently when I had the chance to photograph the Second Avenue Subway Project currently under construction in New York City.
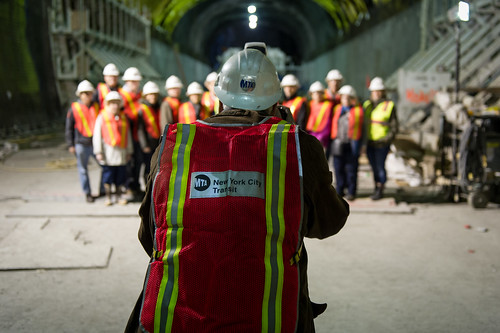
Patrick Cashin, a photographer with the MTA, takes a group photo of neighborhood residents affected by the construction during a tour of the project.
A group photo of neighborhood residents affected by the construction is taken as part of their tour.
My good friend Patrick Cashin, Navy and Air National Guard veteran, is a photographer with the Metropolitan Transportation Authority and is responsible for documenting all aspects of the New York transit system. Part of that documentation includes major construction projects and his recent work photographing the Second Avenue Subway Project is amazing. Pat has never been one to brag, so when he sent me an email earlier this year with a link to a feature that Flickr did on him, I was awed by the work and his story behind it.

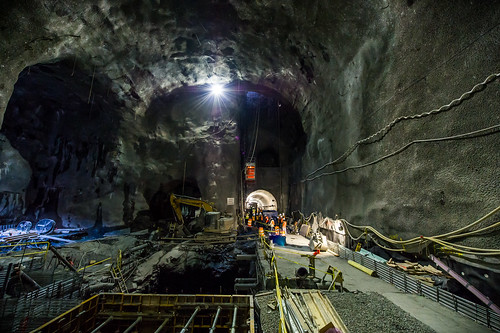
Major construction and blasting is completed for phase 1 of the project.
While major construction and blasting is completed for phase 1 of the project, scenes like this still serve to offer a glimpse of what it takes to create new stations and subway lines.
The very first thing that caught my eye when I saw Pat's photographs was the shear scale and size of the project and how some of the photographs he captured looked like they could have been taken 100 years ago when the first subway was built from City Hall to the Bronx.*

So last month as I was planning my trip to New York City for Photo Plus Expo, I made plans to meet up with Pat, even if only for a quick lunch or dinner. He responded that he was also attending the expo, but the real surprise was that he asked if I would be interested in joining him on an assignment the next day photographing underground. Better yet, he had secured permission for me to photograph as well.**

Typically only residents of the neighborhood affected by the project are given the chance to tour the project. One restriction, however, is that they are not allowed to take photographs, which is why the MTA provides a photographer to both document the tour and take a group photo.
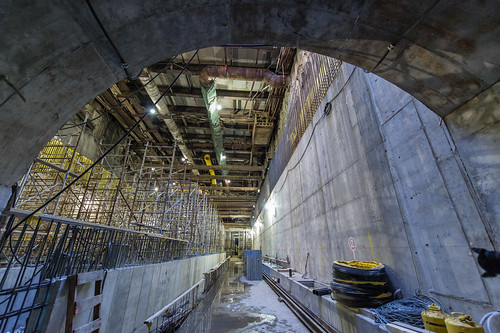
View of the future 96th St. Station. Mixed light made some color correction during post processing a must.
View of the future 96th Street Station using the train tunnel to help frame the shot.
There were two tours scheduled and I would be able to stay underground with Pat between those tours, giving me a total of about three hours to take photographs.

For gear I was pretty sure of two things. That it was going to be dark and that I wanted to shoot wide, so I brought with me the Nikon D3S along with two lenses, the 14-24mm and 24-70mm. And of course I also had my Fujifilm X100S . I knew that light would probably be the biggest issue. I didn't bring a tripod so I relied on the high ISO capabilities of the Nikon D3S to capture the scene. The trade off of course is noise. I processed the images using Lightroom 4.0 where besides some color correction, I opened up the shadows and ran some noise reduction. But for the most part a little noise in these types of photographs does not bother me. With few exceptions I set my ISO to 3200 and everything was shot RAW.
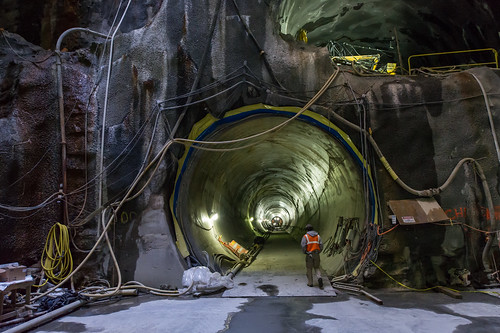
Including a MTA employee helps to show the scale of the subway tunnel.
Including a MTA employee in the photograph helps to show the scale of the train tunnel located at the south end of the future 86th Street Station.
Once underground I really was struck by the size of the project, but how do you translate that in your photographs? Using a wide angle lens and including people is a great way to give the view that sense of scale. Even though this was Saturday and there was not any work going on, I was able to include a few workers who where on hand mostly for safety reasons.
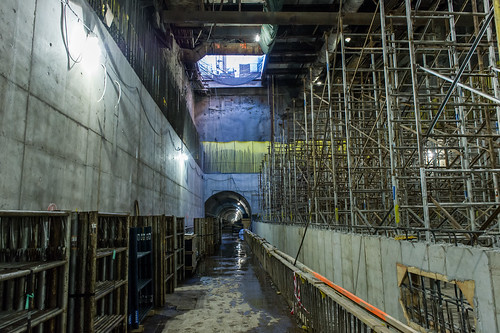
An opening to street level allows some natural light into the future 96th Street Station.
An opening to street level allows natural light into the future 96th Street Station which created some challenging mixed light situations.
Another challenge was the mixed lighting. It turned out to be a bit of daylight mixed with fluorescent and who knows what else. In situations like this I always shoot both JPEG and RAW which then gives me the option to color balance after the fact. Why both? Most of the time I never open the RAW images from an assignment. I think of the RAW files as my insurance, because in reality JPEGs just fit into my work flow allowing me to quickly download, caption and transmit. And in this case I wanted the JPEGs so I could look at and edit a few images on my iPad during the train ride back to Washington, D.C.
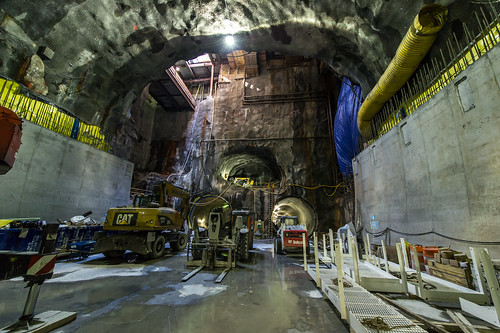
The 14-24mm lens allowed me to emphasize the shear size of the project.
Shooting wide with the Nikon 14-24mm lens allowed me to emphasize the size and scale of the project.
Do you have friends or family that can get you access to interesting places? I bet if you think about it, you do. Also think about what you do for a living or something you have access to and if it might be interesting to a photographer friend. We tend to not think of what we do as interesting, but in many cases if you stepped back, you would realize that there might be unique opportunities all around.
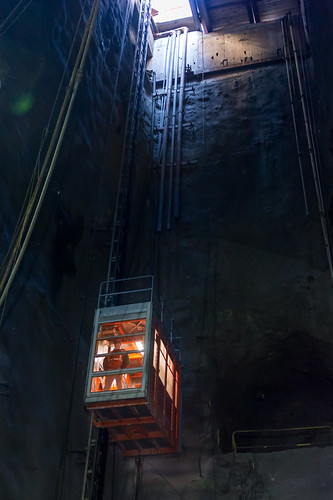
An MTA employee makes the 150' trip to the surface from the 86th Street Station.
An MTA employee makes the 150' trip to the surface from the future 86th Street Station.
MTA on Flickr:
Metropolitan Transportation Authority of the State of New York

*This project was originally proposed in 1929 as a major expansion, although work never commenced due to the Great Depression. Digging for the project did begin in 1972, however it only lasted a few years before New York became insolvent. Ground breaking for the current project happened in 2007.

Phase I of the current project begins at 96th Street then runs south where is will join the existing 63rd Street Line. Additionally, three new stations will be located at 96th Street, 86th Street and 72nd Street. I entered the project via 125 foot elevator at the 86th Street location and then walked underground via the rail tunnel to the 96th Street station and back.

**In order to photograph the project I had to sign an agreement with Capitol Construction limiting my use of the photographs and while I do retain copyright, I am unable to license them for commercial use. For all inquiries about photo use, please contact Rosanna Alcala at ralcala@mtacc.info.