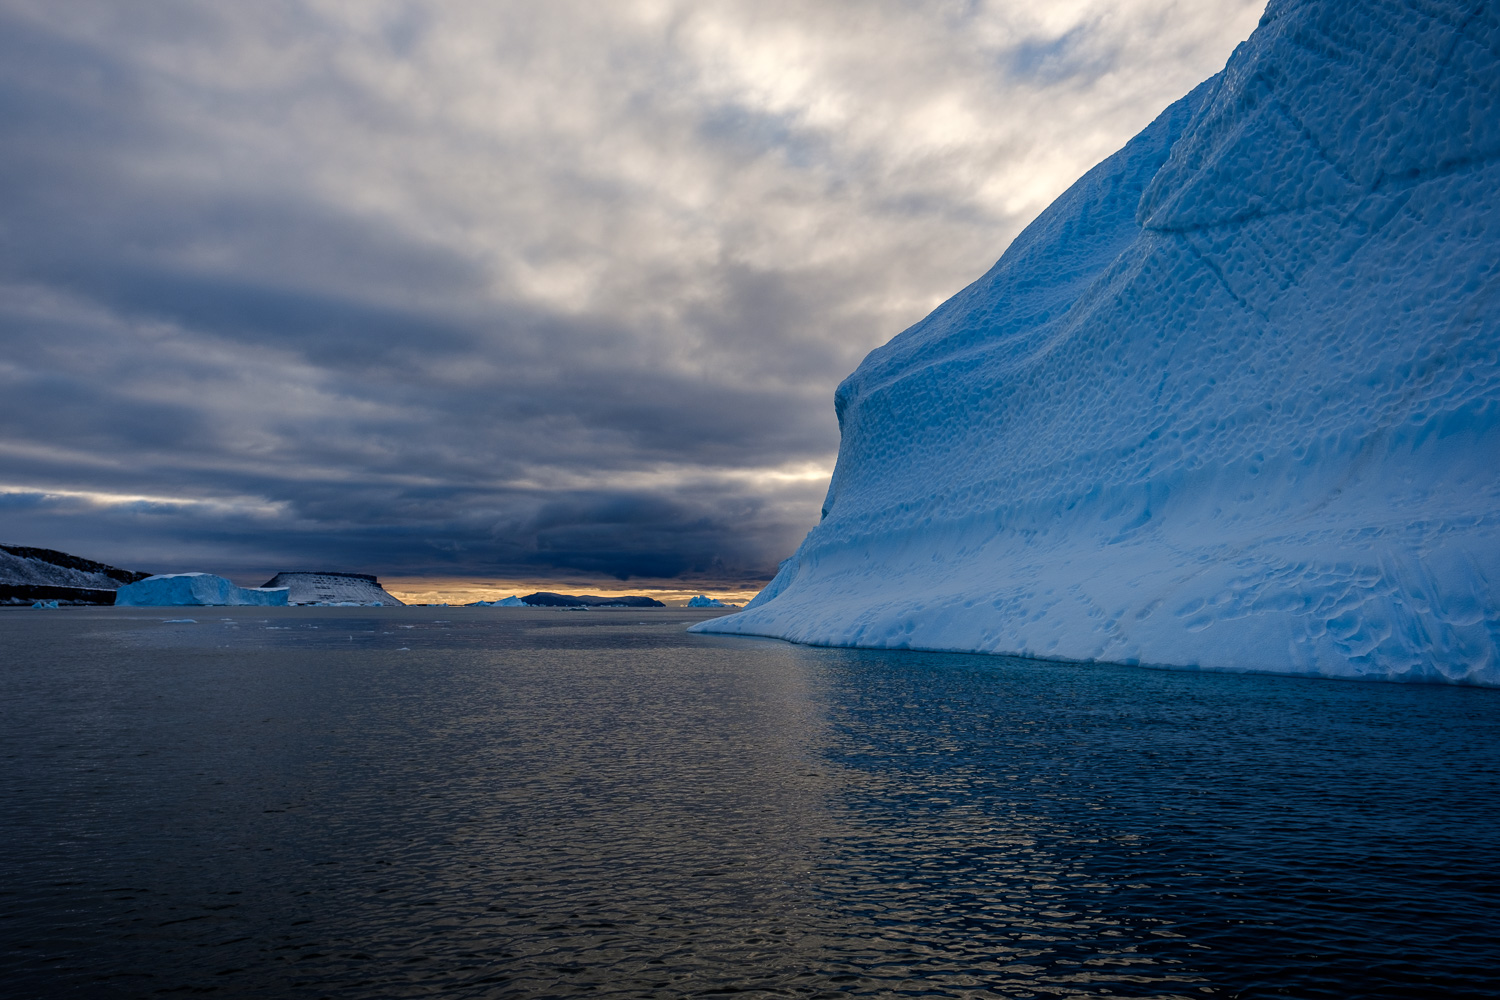
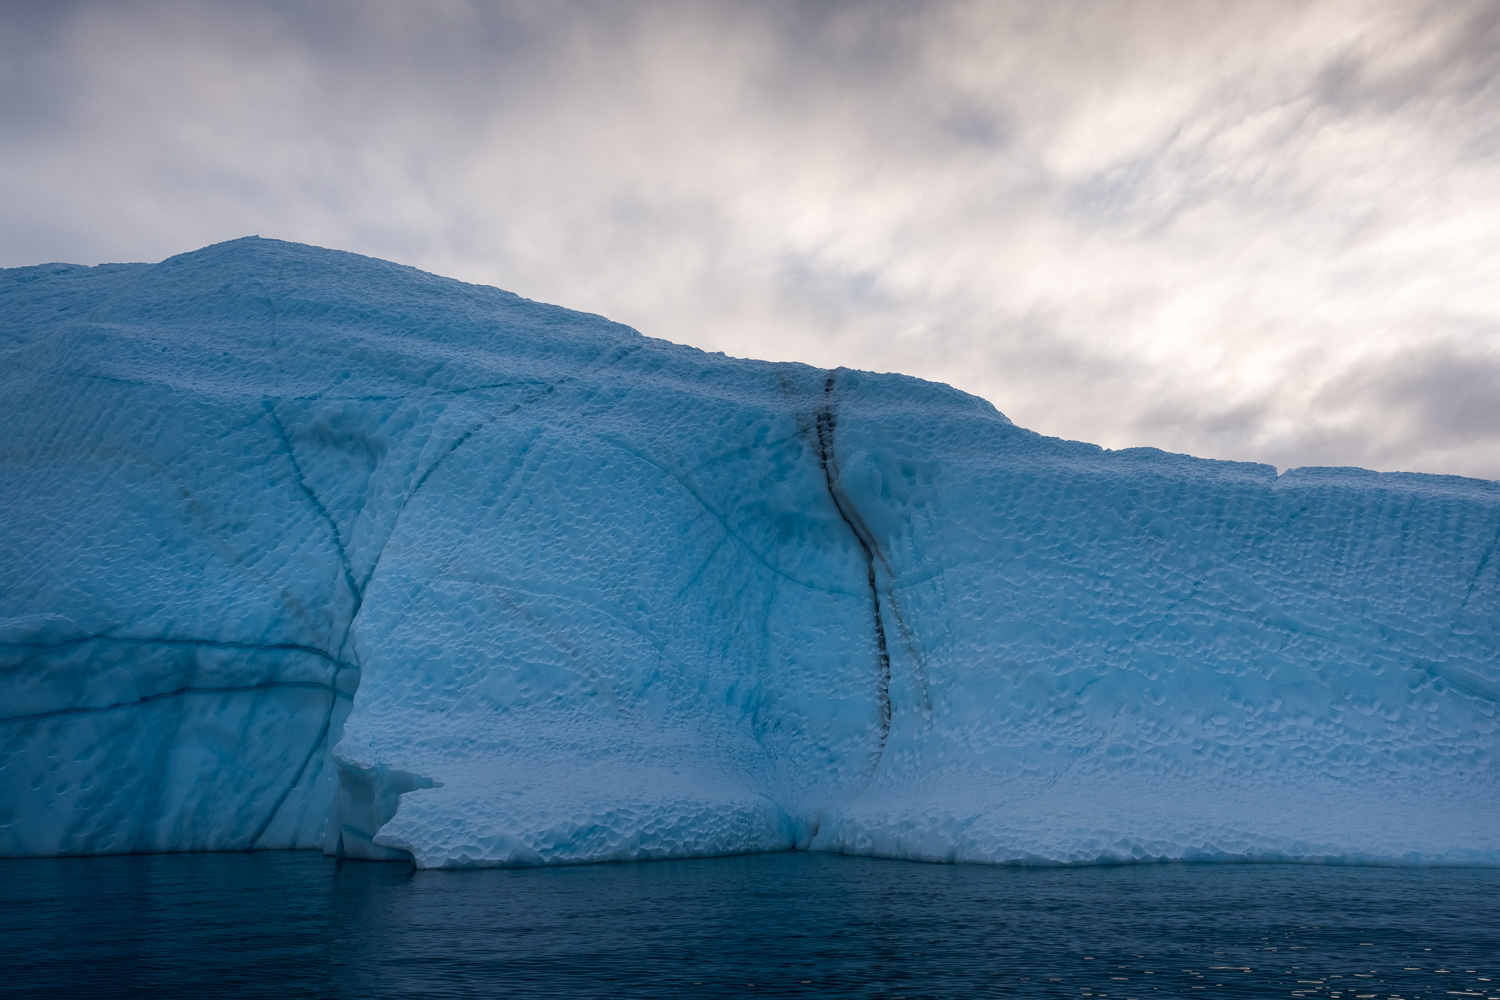
FROZEN - PHOTOGRAPHING ICEBERGS

Fujifilm X-Pro2, 50mm, 1/150 @ f10, ISO 200.

There are many things I have thought about photographing, a sort of bucket list of subjects. This list is not written down and if you asked me to name the subjects, I'd probably struggle a bit and surely would miss a few. Sometimes that's because I don't even know something is on my list until it's right in front of me. Like when I was in Fairbanks, Alaska, a few years back and realized I might have the opportunity to see the Northen Lights. Suddenly that was on my list and after three late night attempts, I was rewarded. 

Shortly after arriving at Thule, Air Force Base in Greenland, I noticed icebergs and suddenly photographing them was at the top of my list.

Fujifilm X-Pro2, 50mm, 1/160 @ f11, ISO 200.

Thule AFB is the northernmost U.S. military installation, located 750 miles north of the Arctic Circle and 947 miles from the North Pole on the northwest side of the island of Greenland. I was on assignment to photograph the deployment of oceanographic buoys over the North Pole. Cool assignment, right? However, since I had several days until the aircraft from which we would drop the buoys from arrived, I had plenty of time to explore and photograph the incredible landscape located all around the base.

Fujifilm X-Pro2, 16mm, 1/480 @ f5.6, ISO 200.

My first real view of the icebergs came while I was photographing Wolstenholme Fjord at sunset. I've photographed so many bodies of water, so many sunsets, and I've even photographed glaciers before. But what makes Wolstenholme Fjord unique is that it's fed by four large glaciers and that was the picture I was trying to make. But it was the icebergs floating throughout the fjord that I found most interesting. I also began to wonder if there was a way to get closer. 

Fujifilm X-Pro2, 50mm, 1/340 @ f8, ISO 200.

What I didn't appreciate at the time, photographing from high above the fjord, was just how big those icebergs actually were. When I finally had an opportunity to get close to them, it just blew me away. 

Once I started taking pictures, I no longer felt the cold, didn't hear the voices of the others in the 15-foot skiff or care that it was almost seven o'clock at night and I hadn't eaten dinner. I was focused on icebergs, shooting, changing between the Fujifilm XF 16mm (24mm full-frame equivalent) f/1.4 and the Fujifilm XF 50mm (70mm full-frame equivalent) f/2 lenses, and shooting some more. 

Fujifilm X-Pro2, 16mm, 1/210 @ f11, ISO 200.

As we approached each iceberg I began to realize how different each one was. From a distance, they all look pretty much the same, but seeing them from sea level, up close, you appreciate that each one is unique in shape, size, and color. As we neared each iceberg I would begin taking photographs and just when I thought I took every photograph possible and lower the camera, something would change and I would find myself shooting again. 

Fujifilm X-Pro2, 50mm, 1/500 @ f5.6, ISO 200.

The icebergs actually seem to change color as you move around them. Going from white to blue, and all shades in between. From a distance, they had a monochromatic look, but up close it was evident they were anything but. To make it even better, the sun setting (something that seems to last forever at this time of year in Greenland) and the clouds hung in the sky and provided a nice contrast to the icebergs.

Fujifilm X-Pro2, 16mm, 1/680 @ f5.6, ISO 200.

In total, I had a little over an hour to photograph as we moved from iceberg to iceberg. I could have spent two hours capturing more icebergs or probably spent the whole hour on just one iceberg.

COMPOSE THE SCENE, THEN WAIT

1/1800 @f4.0, ISO 200.

The title of this blog comes from something Sam Abell* said during his presentation, The Life of the Photograph, at OPTIC 2017. I have watched and rewatched that presentation several times now and there is no doubt that I will watch it again.

During the presentation, Sam takes us through his thought process when making a photograph. But this idea of finding a scene, composing the image and then waiting, really stuck with me. I struggle sometimes with the patience that is required when photographing on the street. Why can I sit for hours waiting for just the right light when photographing landscapes, but while walking the streets of a city, I move as fast as the pedestrians around me.

1/1600 @f4.0, ISO 200.

As I set out to photograph the 187th Indepence Day Parade of Churches and Sunday Schools in Roxborough, Philadelphia, I decided to test out the idea of just staying in one place, with one lens and let the parade pass me by. Not a real stretch I know, but it was the idea of finding the right background and light and then waiting for the uncontrolled action to pass in front of my camera.

I walked most of the parade route and finally settled on background that was fairly uncluttered and in the shade. There was also shade on my side of the street which meant the foreground would be in shadow as well. That provided natural framing if I exposed for the light that would fall on the parade goers. 

1/2200 @f4.0, ISO 200.

With the background picked, I finished off the composition by selecting the Fujinon 50mm (75mm equivalent) f2.0 lens attached to my Fujifilm X-Pro2. This focal length meant I had only one or two shots before the subjects passed by. The benefit of a parade, of course, is that you can see what's coming and know they are not going to change their course. The downside is that you can't control who will plant themselves on the opposite side of the street to watch the parade. Or that it would be the one July 4th parade-goer who wore bright orange instead of red, white, or blue.

In deciding what to photograph, I looked for color, flags, and enthusiasm. I did choose to present all the photographs in black and white, and not just because of the previously mentioned, man in orange, but I liked how the contrast of light and shadow, put all the emphasis on the subject. 

1/3000 @f4.0, ISO 200.

This parade is not like a typical parade made up of marching bands, fire trucks, and floats, but consists of parishioners from all the churches located in the Roxborough section of Philadelphia, 15 participated this year. There are a few classic cars or perhaps a band made up of from the congregation, but it is really just a way to start Independence day before they head to their church for a picnic.

I'm happy with my results although I keep wondering if I should have chosen an alternative spot as a backup or would it have been better to pick an interesting group and follow them along the parade route, however, I think as an experiment it was best that I just stayed put.

* Sam Abell is an American photographer who has worked for the National Geographic Society since 1970 photographing more than 20 articles on cultural and wilderness subjects. In addition to numerous books, he lectures on photography and has exhibited his images to audiences around the world.

INSPIRED BY ART WHILE MAKING ART - PHOTOGRAPHING IN MUSEUMS

At the Corning Museum of Glass in Corning, N.Y., the galleries offer plenty of photographic opportunities. Here, I was drawn to the monochrome look of the background and the contrast with the color and form of the glass. I also like how the shapes created by the silhouettes of museum-goers interact with the curves of the glass. Fujifilm X-Pro2 with a 50mm F2.0 lens, 1/500 @f5.0, ISO 400.

There are many reasons to visit museums, art, history or otherwise, but I find that for me, it's all about being inspired while finding inspiration and at the same time making photographs. And while I love when museums feature photography exhibits, inspiration can come from all kinds of exhibits, such as paintings, mixed media, or the building itself.

Below are five tips to keep in mind when photographing in museums. 

1. If you plan on taking your camera to the museum, make sure they allow photography. I find that most museums today do allow photography with a few caveats. No flash photography, tripods or video are pretty standard. Occasionally, some exhibits will be clearly labeled as off limits to photography. I've also have seen where cell phone use is banned, but have never seen it enforced.

I use the pop of color and door frame to draw you into this photo taken at the National Gallery of Canada in Ottawa. The guard in the doorframe breaks up the scene and adds some life. Fujifilm X-Pro2 with a 50mm F2.0 lens, 1/40 @f2.8, ISO 320.

2. Don't just walk around photographing artwork just to duplicate the artwork. Take the time to see the art in its environment. Or how one piece plays off other pieces in the space. Or does the space or room itself become the focal point of your photograph?

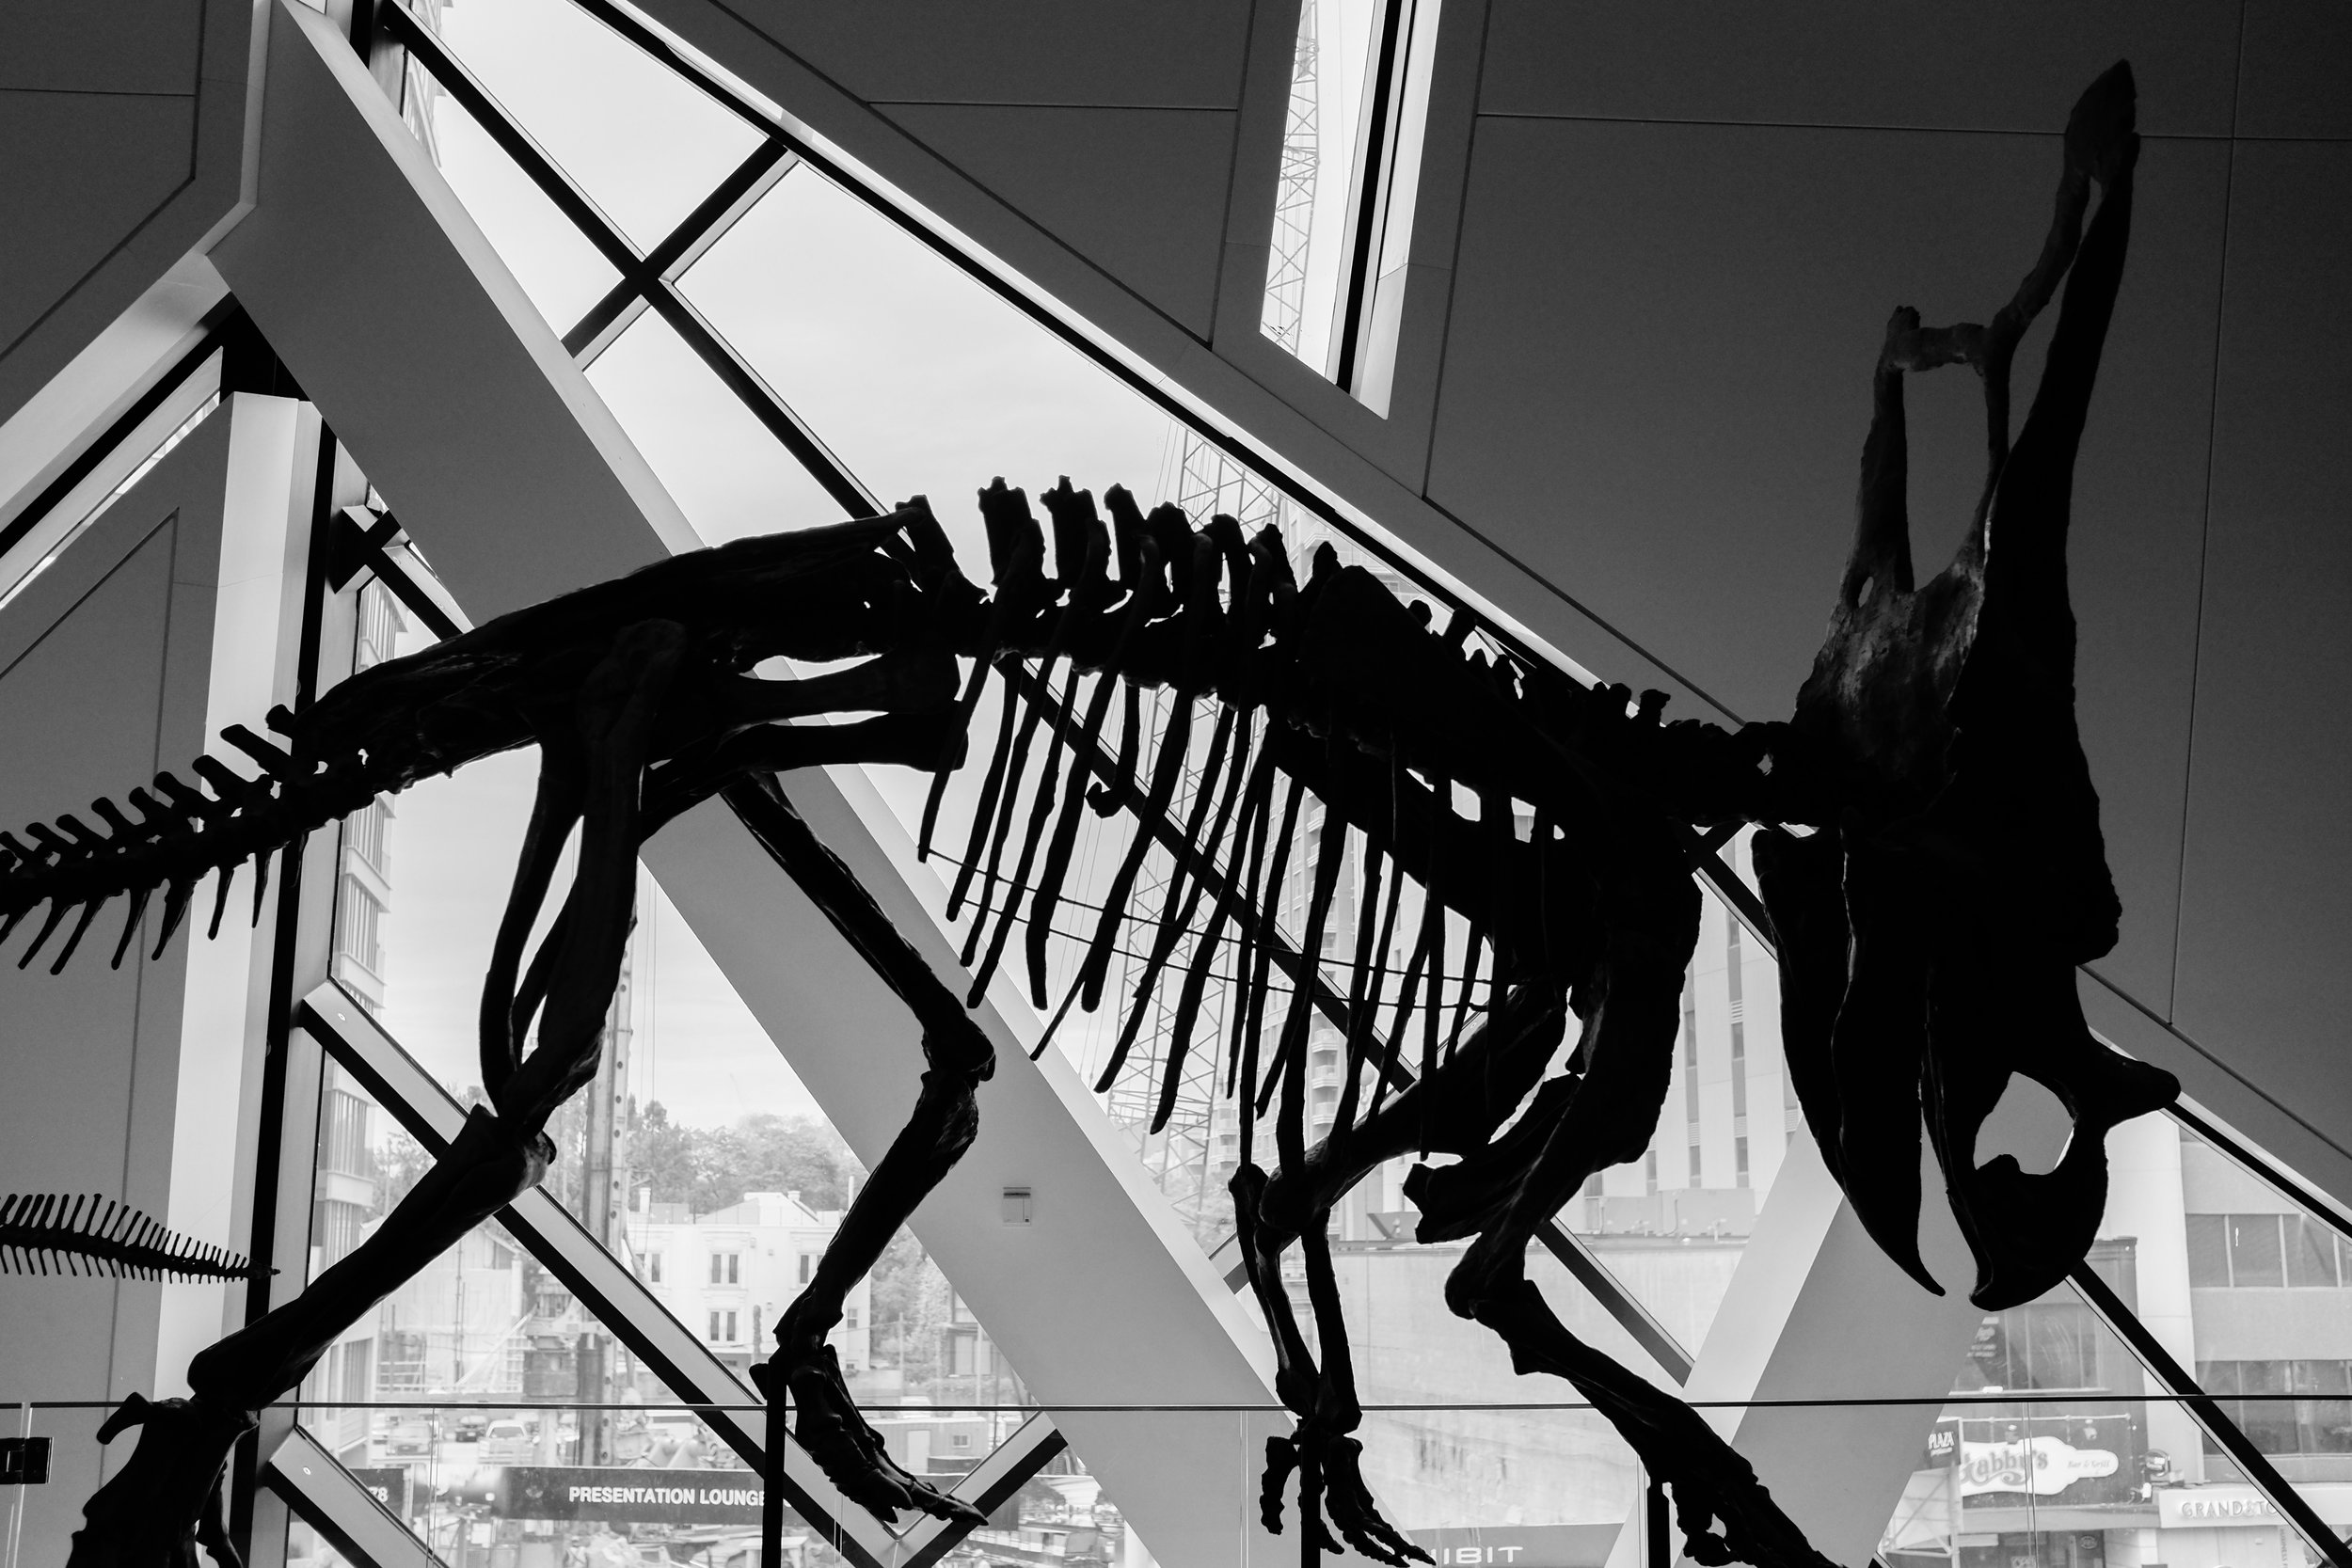
The Royal Ontario Museum located in Toronto, Canada, has a great mixture of exhibits located in a wonderfully designed building. In this photo, I used the straight lines of the windows to contrast with the curved lines of the dinosaur. Choosing to present this as monochrome further emphasizes the patterns. Fujifilm X100S, 1/1250 @f2.8, ISO 800.

3. Be courteous to other museum goers. Don't plant yourself in a way that puts you in a spot which blocks others from viewing exhibits. I like to keep moving until I see something that might make a nice photograph and if taking the photo at that time would impede on others experiences, I'll just take note and circle back. Also be mindful of shutter noise. If your camera has the capability of a silent shutter, this is the time to use it. Otherwise, just be mindful. 

Museums typically have some great natural light and I think in this photo that's what gives it a light airy feel and compliments the art. People can bring a museum to life and like to include them whenever possible, however, I rarely make them the center of attention. It's for that reason that I often use silhouettes or obscure faces. Fujifilm X-Pro2 with a 50mm F2.0 lens, 1/1000 @f2.0, ISO 320.

4. Sometimes I like to find a bench or seat and just wait until a scene comes together. Patience is key. If you sit somewhere long enough you become part of the scene and others won't even notice you. If you are standing in one place with a camera, people may avoid you, not wanted to get in the way of what they perceive you are photographing. Stepping outside the gallery for a few minutes and then returning can reset the natural mood of others.

What caught my eye in this image at the Royal Ontario Museum located in Toronto, Canada, was the rhino behind glass as if it's guarding this gallery, but somehow being held back. Fujifilm X100S, 1/8 @f4.0, ISO 800.

5. Take the time to enjoy your visit as well. Remember the inspiration part of this post? Step back, put down the camera and enjoy the art and exhibits around you. Many times you can also meet other like minded people and strike up a conversation. 

SILENCE IS GOLDEN WITH MIRRORLESS CAMERAS

Carol Cannon, with Allison Tsai on piano, perform at the Centre Street Performance Space, part of the Johns Hopkins Peabody Institute, in Baltimore, Md. Fujifilm X-Pro2 with a Fujinon 50mm, f2. 1/160 @ f2, ISO 1250.

While reading the recent release announcement of the Sony a9, something buried in the article caught my attention. It wasn't that it was full-frame or that it was capable of 20 frames per second or even how this could finally be the mirrorless camera to cover sports, but that because of its electronic shutter, a photographer could get shots like never before.

Okay, the electronic, or silent shutter, is not new. In fact, I've written about it before. I just wondered why all of a sudden I was reading several articles about this new Sony camera extolling the fact that we could now have a mirrorless camera capable of shooting sports while not making any shutter noise. Was it all about making photos of golfers in their backswings we'd see now?

I took these photos from my seat while the event's official photographer, with two Nikon D5 cameras, who was sitting right in front of me could only watch. The soloist never knew I was taking these pictures. Fujifilm X-Pro2 with a Fujinon 50mm, f2. 1/160 @ f2, ISO 800.

The reality is for those of us that shoot both mirrorless and DSLR cameras, the benefits of that electronic shutter is well known. During meetings, performances, or being discreet on the street, any time that the clunk of a shudder would draw attention or break the mood, the electronic shudder wins. And, yes, it even has its place when covering sports.

I understand the mechanics of why a DSLR makes noise and often use the quiet shutter-release mode on my Nikon D4s. While it is sometimes the better option, it still isn't silent. And because shutter noise can be distracting, get you noticed, or worse, get you kicked out of a room, it is nice to have the option of an electronic shutter.

Silence is golden, which is why my default setting on the Fuji X-Pro2 is silent, all sounds muted or turned off. I even go as far as to cover the indicator lamp with gaffers tape.

The electronic shutter allows for a certain amount of stealth, even when it is obvious you are taking pictures. But without shutter noise, it's easy for the subject to forget you are there, allowing you to blend into the scene and truly capture the moment.


PHOTOGRAPHIC ADVENTURE BLOG - SHENANDOAH ON A MOTORCYCLE, A TEST

In this episode, I take my Triumph Bonneville, loaded with camera gear, to Shenandoah National Park. This was a test ride to work out the logistics of taking camera gear along for a ride and how I would secure the motorcycle gear in order to leave it while going off on a hike or spending the night on the trail.

I did manage to take one photograph during this trip, but you have to watch to the end in order to see it. 

See the show notes for links to the gear I discuss in this video.