PHOTOGRAPHING IN THE GREAT SMOKIES - FINAL DAY

Smoky Stream. 8 @ f20, ISO 100, two graduated ND filters stacked.

Smoky Stream. 8 @ f20, ISO 100, two graduated ND filters stacked.

Day three and the final day of this trip started at 6 a.m. with a 16-mile drive from Gatlinburg to the Newfound Gap Overlook. When I planned this trip, this location is what I had been most looking forward too as the place where I would get the iconic shot of the Great Smoky Mountains.

When I started the drive that morning I knew that the photo probably wasn't going to happen. It was drizzling and visibility was not good, and that was at the bottom of the mountain. Well sure enough when I reached the overlook at 5,046 foot right on the Tennessee - North Carolina border, it was socked it. I don't give up easily while on location, however after two and a half hours of waiting, I was pretty sure that it wasn't going to clear up.

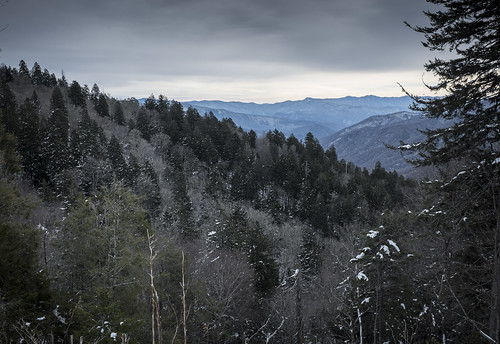
While the clouds blocked any chance of a view from the Newfound Gap overlook, just down the road from the summit there were short glimpses of the mountainside. 1/400 @ f9, ISO 400.

While the clouds blocked any chance of a view from the Newfound Gap overlook, just down the road from the summit there were short glimpses of the mountainside. 1/400 @ f9, ISO 400.

While it was clear that I would have to wait until another time to get the iconic shot, there had to be something to photograph. As I mentioned yesterday, there are pull-offs along the Newfound Gap Road, so I figured I would head back down the mountain to see if it was any clearer and if there was something - anything, to photograph.

I came across a stream running down the mountain that looked like I would be able to access it from a pull-off a short distance away. Photographing a stream was also the perfect opportunity to work with myCokin Z Pro Series ND Graduated Filter Kit in order to slow the shutter long enough to achieve the silky look of the running water. Because these filters are 4x6 inches, I was able to use them in an unconventional way, to cover the entire front of my 24-70mm lens. Further, I doubled up the filters in order to slow the shutter speed to between 4-10 seconds but still maintain a proper exposure. In a future post, I will go into much more detail on using these filters. 

When something on the side of the road catches your eye you have to make a decision as to whether or not you are going to make a u-turn and photograph it. I urge you to make more u-turns. 1/300 @ f8, ISO 200.

When something on the side of the road catches your eye you have to make a decision as to whether or not you are going to make a u-turn and photograph it. I urge you to make more u-turns. 1/300 @ f8, ISO 200.

Finally, I decided that I would just head down the mountain and start making my way to Boone, N.C., via the Blue Ridge Parkway, but first I made a stop at the Cataloochee visitors center. There I verified with the park ranger that it was not going to clear up. Instinctively I probably knew that, but it never hurts to check with someone who knows the area well. Even more so since I was seeing blue skies and nice clouds, it was good to have the reassurance that nothing had changed at the summit.

Right after leaving the visitors center my plans changed when I was confronted by a closed Blue Ridge Parkway. In my original post, I wrote about all the research I did on the Great Smoky Mountains before my trip, but the extent of my research on getting to Boone, N.C., from Gatlinburg, via the Parkway, was to simply look at a map. When I finally had cell coverage and pulled up their website, I saw that many of the sections I wanted to drive were closed during the winter of 2014 - 2015 for repairs. (There is also a real-time road closure website.) 

Along the very short section of the Blue Ridge Parkway I traveled, there were plenty of scenic overlooks, without much of a grand view, but these trees still proved interesting when taken from a low angle with a 14-24mm, 1/125 @ f22, ISO 200

Along the very short section of the Blue Ridge Parkway I traveled, there were plenty of scenic overlooks, without much of a grand view, but these trees still proved interesting when taken from a low angle with a 14-24mm, 1/125 @ f22, ISO 200

Now that a nice leisurely drive along the Parkway was out, I still tried to stick to back roads on the drive to Boone, but it wasn't the same. The only positive was this happened during the middle of the day, a time that I typically take a break from shooting.

Once again it pays to turn around from the setting sun. This sunlight kissing the tops of these trees lasted only five minutes. 1/80 @ f9, ISO 200.

Once again it pays to turn around from the setting sun. This sunlight kissing the tops of these trees lasted only five minutes. 1/80 @ f9, ISO 200.

Fortunately after checking into my hotel and getting on my computer, I did find a 15-mile section open from Blowing Rock heading south to just past the Linn Cove Visitors Center. As bad as the weather was earlier in the day, it was looking really nice now. The Blue Ridge Parkway meanders 469 miles and even if I were to pull over every time I had the opportunity in the 15 miles I covered, the sun would have set long before I finished. Many of the scenic overlooks are not that scenic, even with no leaves on the trees, so you have to trust your instincts a bit and keep an eye on the sun and light.

Once again it pays to turn around from the setting sun. This sunlight kissing the tops of these trees lasted only five minutes. 1/80 @ f9, ISO 200.

Once again it pays to turn around from the setting sun. This sunlight kissing the tops of these trees lasted only five minutes. 1/80 @ f9, ISO 200.

I also realized that some of the grand views were not all that grand this time of the year. Unlike the contrasts of color I found in the Smokies, all I saw along this short section of the Parkway was brown. Now in the Fall I'm sure these views are spectacular, but for now I just moved on from one overlook to the next, finally settling on a frozen Price Lake to make my final photos of the trip

If you get the chance to visit Great Smoky Mountain National Park, even for a day, make every effort to do so. If you are a photographer, I would plan on spending a minimum of three days so that you can cover a few different locations during different times of the day. There are also plenty of hikes, some short, that will get you away from the crowds and offer you even more opportunities to make wonderful images in the second most-visited National Park.

Previous posts in this series:

PHOTOGRAPHING THE GREAT SMOKIES - THE PLAN AND THE GEAR

PHOTOGRAPHING THE GREAT SMOKIES - DAY ONE

PHOTOGRAPHING THE GREAT SMOKIES - DAY TWO

PHOTOGRAPHING IN THE GREAT SMOKIES - DAY TWO

Low clouds backlit by the rising sun. 1/50 @f22, ISO 400.

Low clouds backlit by the rising sun. 1/50 @f22, ISO 400.

What a difference a day makes. I entered the Cades Cove loop through the already open gate at 7 a.m. and headed straight to the location I had decided on yesterday, passing only one other person along the way. The sky was clear and there was a cloud layer that was moving fast across the top of the mountains.

It is exciting to imagine photos coming together in your mind as you are driving along and it took everything I had not to stop and start shooting prior to arriving at my pre-planned destination.

Once I parked and set up my tripod and camera with a 24-70mm, I forced myself to take a breath and relax. While it seems everything is happening fast, often there is more time than you realize. It is better to get it right than realize your ISO was still on 3200 from the night before. In this case, I worked the sunrise for almost 30 minutes before it was completely up over the mountain. In that time I was able to use multiple lenses, bracket, try out my new split neutral density filters and move about 50 yards down the road for a slightly different composition.

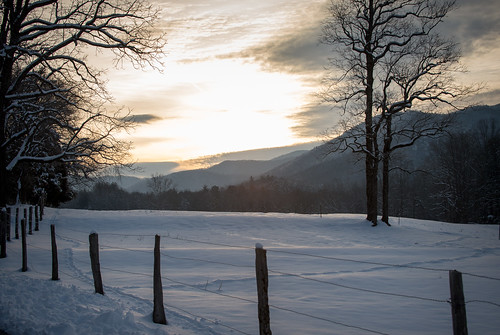
Switched to the 24-70mm with a Cokin split neutral density filter just as the sun rose above the clouds. You can see how the clouds just stuck to the top of the mountains. 1/60 @ f22, ISO 200.

Switched to the 24-70mm with a Cokin split neutral density filter just as the sun rose above the clouds. You can see how the clouds just stuck to the top of the mountains. 1/60 @ f22, ISO 200.

Remember as the sun is rising and consuming your attention, all that great light is falling somewhere and that somewhere is behind you. When I did finally turn around I immediately was drawn to the tops of the mountains and those clouds which were slightly backlit, yet at the same time light was falling on the face of the mountain. I only had to cross the street and climb a slight embankment when I saw that the sun was hitting the trees in the foreground.

Once the sun rose above the clouds I turned around and was treated to some wonderful light. 1/40 @ f22, ISO 200.

Once the sun rose above the clouds I turned around and was treated to some wonderful light. 1/40 @ f22, ISO 200.

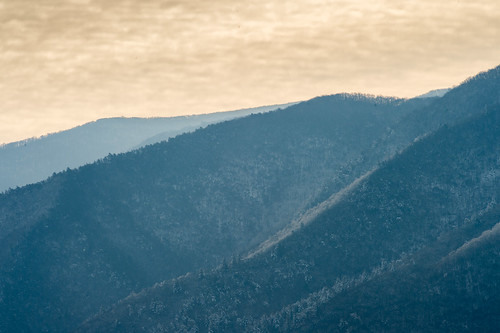
When I see layers leading into a photograph, I instantly think of long lenses and compression. It doesn't matter if the layers are created by color, tonal quality, or texture, compressing and flattening the scene makes a pleasing photograph.

On my drive in I saw plenty of deer and thought it was time to move to a new location and with only a few other cars on the loop, I was able to exit and re-enter in about 20 minutes. Once back on the loop I stopped a few times and waited in locations where I had seen wildlife the previous day and sure enough, I spotted four deer off in the distance in the same field I had seen the coyotes.

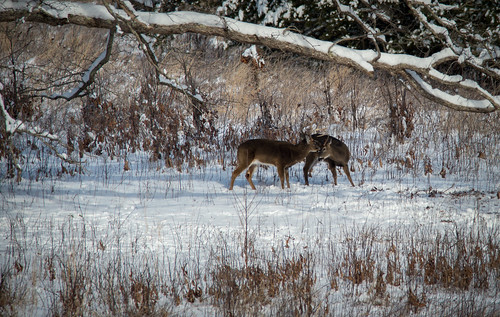
They were a fair distance off so I grabbed my 300mm with a 2x converter. It was then that I noticed there were three bucks and a doe. After waiting and watching it became clear that the bucks were going to interact and sure enough, they locked antlers several times. It also became clear that they were slowly moving in a direction that would have them crossing the road just below where I had spent the morning. I debated staying put, but sometimes you have to take a chance and move.

I'm glad I did. As I parked the deer were still heading in the same direction so I moved to the exact location that I had taken the above photograph earlier. As the deer continued to head in my direction they were still slightly backlit, but after they crossed the road the light was perfect and when they started to run as a car approached, I just started shooting. I had a long lens on which was nice to capture the deer but meant I was unable to include any background or context.

I moved to higher ground in order to capture this photo of a male whitetail deer. Thinking ahead in order to place yourself in the right spot is key to getting the photograph you envision. 1/800 @ f7.1, ISO 200.

I moved to higher ground in order to capture this photo of a male whitetail deer. Thinking ahead in order to place yourself in the right spot is key to getting the photograph you envision. 1/800 @ f7.1, ISO 200.

By mid-morning I decided to pack up and leave Cades Cove and explore more the Great Smoky Mountains, but not before one more stop at Tipton place. Only this time I was across the road photographing the double-pen corn crib and cantilever barn when the dripping water from the roof caught my attention. Up until this point everything, other than wildlife, was a medium or wide angle photograph, so it was nice to get a detail shot.

Sometimes it's about the details. With locations like Cades Cove, the tendency is to focus only on the vistas, but sometimes a photo like this tells the story of melting snow. 1/640 @ f2.8, ISO 200.

Sometimes it's about the details. With locations like Cades Cove, the tendency is to focus only on the vistas, but sometimes a photo like this tells the story of melting snow. 1/640 @ f2.8, ISO 200.

On the way to Gatlinburg, I stopped at the Sugarlands visitor center and looked around the museum. This is a great thing to do in the middle of the day and besides giving you a break, it gives you some history and context, which may lead to additional photo ideas. Additionally, rangers can be a wonderful source of information on hidden shooting locations.

After leaving the visitors center, I thought I would drive the 13 miles to the Newfound Gap outlook and scout out locations for the next morning. It is a really pretty drive although it soon became apparent as I increased in elevation that I would be entering the clouds by the time I reached the summit. Of course, these were the same clouds that I had been photographing in the morning.

So before I was fully in the clouds, I stopped about a quarter mile from the top and took a few photos of the clouds moving by which added some softness to the bare trees. Tomorrow I plan on heading back to the summit to photograph the sunrise even though the forecast calls for rain.

Just short of the Newfound Gap summit, the clouds were already rolling in and provided just the right amount of softness you see in this photograph. 1/800 @ f7.1, ISO 200, Exp. Comp. +1

Just short of the Newfound Gap summit, the clouds were already rolling in and provided just the right amount of softness you see in this photograph. 1/800 @ f7.1, ISO 200, Exp. Comp. +1

PHOTOGRAPHING THE GREAT SMOKIES - DAY ONE

Cades Cove in the Great Smoky Mountains National Park just after first light.* 1/250 @ f10, ISO 400.
Cades Cove in the Great Smoky Mountains National Park just after first light. 1/250 @ f10, ISO 400.
Day one began at the entrance to the 11-mile one-way Cades Cove loop road along with a half dozen other cars waiting for the park ranger to open the gate. The plan was to photograph the sunrise, however, the ranger didn't open the road until roughly 7:20, so the sun was already over the horizon. The first day of any assignment, whether a paid job - or like this, a self-assignment - brings with it some anxiety and anticipation. I've never been able to shake that, but, of course, the only thing to do is just start shooting. Anything will do, the point is to just start shooting.

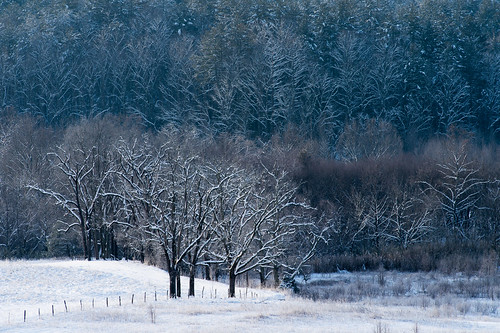
Because temperatures remained cold in the morning, recent snow still stuck to the trees, offering nice contrast between the bare trees in the foreground and the pines in the back. 1/320 @ f13, ISO 400. TIP: Using a long telephoto lens compresses the scene and enhances the contrast between foreground and background.
Because temperatures remained cold in the morning, recent snow still stuck to the trees, offering a nice contrast between the bare trees in the foreground and the pines in the back. 1/320 @ f13, ISO 400. TIP: Using a long telephoto lens compresses the scene and enhances the contrast between foreground and background.
So as I entered the loop with the sun already rising fast, I pulled over at the first opportunity and began taking photographs. It wasn't great, but it did fit the idea that I start shooting. Ideally I would have been able to scout the location so that I had a better idea of where to stop along the 11-mile loop to get that first shot. With 11 miles to cover you never really know what's ahead of you and since it is a one-way loop, you can't turn back. I did four trips around the loop, two in the morning and two in the afternoon.

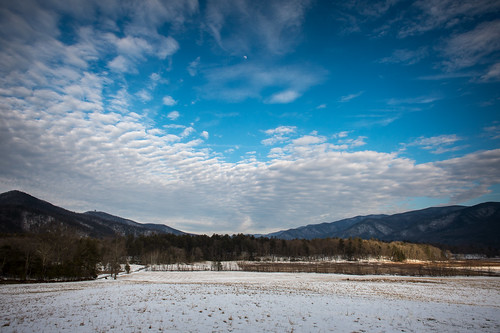
Still fairly early in the morning there was a slight warmth to the sky while the mountain has a blue-green look. The colors change throughout the day offering many looks at the same scene. 1/800 @ f16, ISO 400.
Being unfamiliar with the route, I pulled over almost every opportunity, got out of the car and looked around. Sometimes I grabbed my camera and shot, other times, I quickly returned to the car and headed for the next turnout. My goal was to make at least one loop as fast as possible, without missing any photos along the way and then take more time during subsequent loops.

Deer were the most visible wildlife I saw during my visit. Here two bucks greeting each other. 1/250 @ f8, ISO 400.
Deer were the most visible wildlife I saw during my visit. Here two bucks greeting each other. 1/250 @ f8, ISO 400.
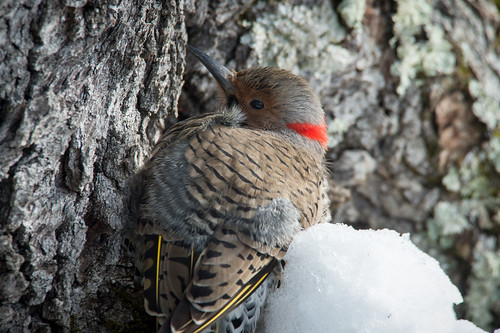
One thing almost all visitors to Cades Cove are sure to see is wildlife. Everything from horses, deer, turkey, elk, wolves, fox, coyotes and black bear*. Your chances of just spotting these creatures are reduced while driving, especially by yourself. I did spot some bucks in the distance and stopped to photograph them for about 20 minutes. I then walked to the other side of the street and that is when I spotted two coyotes moving across the field and finally before getting back in the car, spotted a bird Flicker Woodpecker off to the left. Three nice animals all because I stayed put for a while.

Not all wildlife is large and easy to spot. This Flicker Woodpecker (yet to be identified) was only a short distance from my feet as I was standing around looking at the great vistas. 1/200 @ f13, ISO 400. TIP: Don't forget to look down and always be ready to shoot.
But it is the Great Smoky Mountains, so much of the time on the first loop was spent photographing them. One thing I noticed is that the color temp and look of these mountains change throughout the day depending on light and angles. That was fun; it was like taking a completely different photo of the same scene each time.

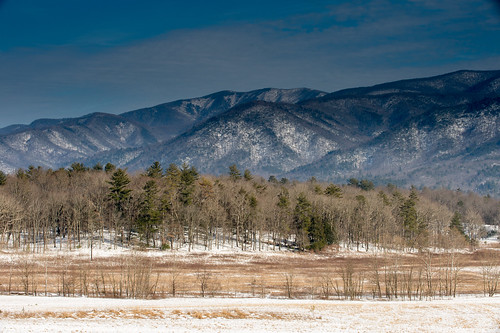
Later in the day the mountains took on a different color and with the warming temperatures and snow melting, more of the grass became visible and provided a warm contrast to the cool mountains and sky. 1/50 @ f22, ISO 200, Cokin graduated ND filter.
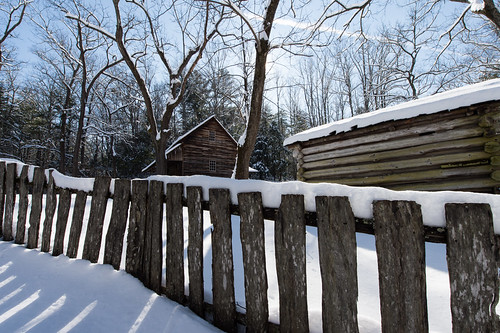
Along the way, there are a number of structures and old cabins to explore. During the second loop as the sun rose, but still provided some quality light, I made sure to explore a few and am glad I did. I was drawn by the warm look of the wood that contrasted with the snow and also the shadows created by fences and the buildings.

Tipton Place is near the end of the loop and offered several structures to photograph. 1/160 @ f20, ISO 400, Exp. Comp. +1. TIP: I shot from a low angle since the snow surrounding the area had been trampled.
Tipton Place is near the end of the loop and offered several structures to photograph. 1/160 @ f20, ISO 400, Exp. Comp. +1. TIP: I choose to shoot from a low angle since the snow surrounding the area had been trampled.
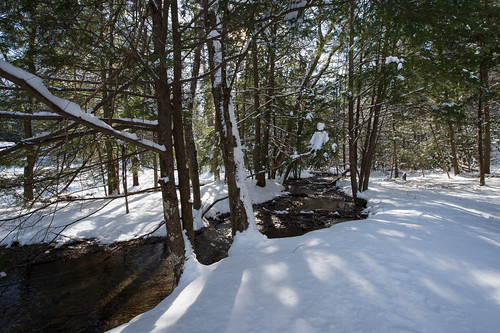
Typically there is more parking located at these sites and since I was already exploring the buildings, it seemed like a good time to explore the surrounding woods. Don't be afraid to walk off the road and into the woods, you might be surprised what is just out of site.

This small stream runs past Tipton Place and allowed me to take advantage of some nice light streaming though the trees. 1/50 @ f20, ISO 400, Exp. Comp. +1. TIP: When shooting into the sun, use the tree or branch to block light from hitting your lens.
This small stream runs past Tipton Place and allowed me to take advantage of some nice light streaming through the trees. 1/50 @ f20, ISO 400, Exp. Comp. +1. TIP: When shooting into the sun, use the tree or branch to block light from hitting your lens.
When I returned in the afternoon it was a different experience for several reasons. First, the temperature had risen 30 degrees which meant the snow was melting fast. The first place I noticed this was the trees. Also, the number of cars making the loop had more than tripled quadrupled, which meant traffic jams as people would just stop in the middle of the one-lane road, mostly to look at deer. So it took more than twice as long to make the loop as it did in the morning. And this is the winter, so be prepared in the Spring. Again, my suggestion would be to take your time and not worry about spending too much time in one location. Why not let the wildlife come to you.

Clouds started to build and the moon came out in the late afternoon once again giving a very different look to the mountains. 1/50 @ f22, ISO 200, Cokin graduated ND filter. TIP: When you have interesting clouds, grab a wide angle and aim high.
With the first day of shooting down, my plan for tomorrow is to return to Cades Cove and a few locations I've identified along the loop in the hopes of getting a better sunrise. Then I'll start making my way to Gatlinburg, shooting and scouting along the way.


* Bears hibernate in the winter.

PHOTOGRAPHING THE GREAT SMOKIES - THE PLAN AND THE GEAR

Ever since my trip to Arizona in December 2012, I've been thinking about another self-assigned photography trip, but with a busy work schedule, the time just slipped by.

During the ensuing years, many locations ran through my mind and as 2014 was drawing to a close, I finally decided that I would visit Yosemite National Park during the last week of February 2015. I started the research and planning the flights, hotels, etc., but again time passed and in January when I finally got around to actually making reservations, the trip just started falling apart, mostly due to lodging. The first lesson, commit early.

For a while, I figured that more time would pass before I launched into another adventure. However, I never quite removed the vacation days from my calendar and I just couldn't shake the notion that I wanted to get out and photograph. So again, I started thinking about possible locations and one place kept coming to mind - The Great Smoky Mountains National Park.

I visited the park last year while driving home from Memphis, but only spent the day, but knew then that I wanted to return. Fujifilm X100S, F5.6, 1/550 at ISO 400

I visited the park last year while driving home from Memphis, but only spent the day, but knew then that I wanted to return. Fujifilm X100S, F5.6, 1/550 at ISO 400.

My current plan is to spend two nights in Townsend, Tennessee, one night in Gatlinburg, Tennessee, and one night in Boone, North Carolina, giving me close to four days of shooting. I plan on photographing Cades Cove, Tremont, and Newfound Gap. Unfortunately, popular locations such as Roaring Fork and Clingmans Dome might be out due to winter road closure although I am bringing snowshoes and could possibly hike in.

If you have been following the weather then you know that the East Coast has been experiencing extremely cold temperatures along with snow and ice. The Smokies are no different, so I've been monitoring two Twitter accounts, @GreatSmokyNPS and @SmokiesRoadsNPS, to keep up-to-date on road and park conditions. While most of the photographs I see while doing research were taken during the spring, I love photographing in the winter and, of course, photographing now will hopefully allow me to get images that are different from the rest.

That's the logistics part of the plan, so what about the gear.

Since I'll be driving to this location, I'm probably going a little heavy gear wise, plus I'll need to pack plenty of cold weather gear. And much of the gear I'm bringing is similar my Arizona trip, just updated models.

Cameras will consist of a Nikon D4S along with my Fujifilm X100S. For lenses, I'm bringing the Nikon 14-24mm, 24-70mm, 70-200mm and a 300 2.8. I'll also add a 2x teleconverter.

For a computer, storage and software, I'm using a Macbook Pro 15" with a LaCie Rugged 1 TB USB 3.0 Mini Disk Portable Hard Drive for backup. Software includes Photo Mechanic for ingest and captioning and Lightroom 5 and Photoshop CC (2014), to post-process the images. And various camera storage including CompactFlash cards ranging from 16 - 64GB and a 64GB XQD card.

I will also bring my iPad, mostly for two Apps that I rely on during travel. First is Sun Seeker, which provides sunrise and sunset times and also shows a map view of sun direction for each daylight hour and 3D views of the solar path. Second is The Weather Channel which comes in handy for planning each day. 

Three screen shots of the Sun Seeker app available for the iPad or iPhone.

Three screen shots of the Sun Seeker App available for the iPad or iPhone.

To support the camera's I'm bringing two tripods, a Bogen Model 3033X and a Gitzo Series 00 Carbon 6X with an Arca-Swiss Monoball Z1 ball head as well as a Gitzo monopod.

Rounding out the accessories will be a Nikon SB910 flash, SU 800, PocketWizard Plus (to use as a cable release), and a Zacuto Z-Finder Pro. And finally, something that I'm really excited to use on this trip, the Cokin Z Pro Series ND Graduated Filter Kit. I have not used anything other than a UV filter in front of my lenses since I started shooting digital in 1999. Recently for landscape work I've shot HDR and generally liked the results. What I didn't like was the extra steps along with the post processing time.

As with the Arizona trip, I will update this blog each day of the trip with photographs, lessons learned and how I used the camera gear to make it all happen. Following the trip, I'll write an in-depth post on the Cokin ND filters.

ARE "FILM SIMULATION" PRESETS FOR YOU?

MONOCHROME+YeFilter* (black and white with yellow filter)
Fujifilm recently announced that they are bringing film simulation to their official Raw conversion software, Raw File Converter EX, allowing you to take advantage of the features after, rather than having to make the selection while shooting.

This is good news since I think Fuji does an especially good job with their film simulation modes.

Currently when you select one of the film simulation modes, Provia, Velvia, Astia, PRO Neg Hi or Std, and several Black and White modes, on the camera, they are baked into the JPEG file.

As I've mentioned previously on this blog, the mode I prefer when shooting the X100S is MONOCHROME+YeFilter. But that is only half the story because I also shoot JPEG and Raw at the same time giving me the option during post processing to switch to color or do my own black and white conversion to the Raw file. But normally I really like the job Fuji does with its conversion right out of the camera and then spend extra time converting the Raw image to match.

Does this then mean you no longer need these settings available to you on the camera? I can't make that call, but I do like the option to take advantage of them later.

During a recent visit to Great Falls Park in Virginia, I decided to try out the various film simulation modes on my X100S and see for myself how useful they are. **

Provia/STANDARD: I suppose you need an all-around setting and PROVIA/STANDARD offers standard color reproduction suited for a wide range of subjects.
Velvia/VIVID: A high-contrast palette of saturated colors, suited for outdoor photos. And as it turns out, pretty much the hands-down choice for Fall foliage.
ASTIA/SOFT: Enhances the range of hues available for skin tones in portraits while preserving the bright blues of daylight skies. Outdoor portraits.
PRO Neg. Hi: Slightly more contrast than PRO Neg. Std and recommended for outdoor portrait photography.
PRO Neg. Std: Soft-toned palette. The range of hues available for skin tone is enhanced, making this a good choice for studio portraits.

The Fuji X100S also offers the option to bracket, which to most photographers means some sort of multiple exposures. However, the X100S also allows you to bracket Film Simulations, so you don't even have to stop shooting to change settings.

Starting February 26th, you will be able to download the program for free from the Fujifilm website.

But you will have to wait for this feature to be added to the X100S since initially it will only be available for the X-T1, X-A2, X100T, X30, and XQ2.

* All the photos associated with the blog post are resized JPEGs right out of the camera.
** You can also assign a film simulation mode during playback.