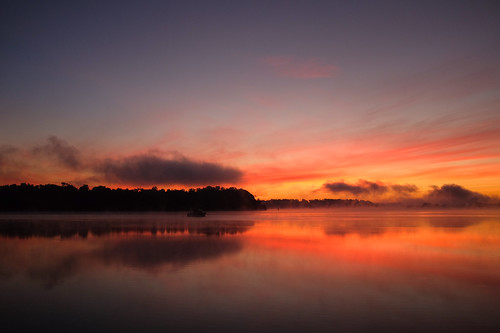
sunset

FINDING PHOTOGRAPHS IN JOSHUA TREE NATIONAL PARK

The light that appears just after sunrise is special. In this case, I liked how it made the sand colored mountains glow. I wanted something in the foreground and picked this lone josohua tree which I originally thought about shooting in silhouette, however, as the sun began to rise above the mountains behind me I knew I would have a few minutes where the sun lit the top of the tree, but before it lit me and cast my shadow into the scene. Sometimes missing the actual sunrise is fine.  Fujifilm X-Pro2 with a Fujinon XF 35mm f2 R WR, 1/60 @ f14, ISO 200.

It was still dark outside when I left Oceanside, Calif., on my way to Joshua Tree National Park, hoping to arrive in time to photograph the sunrise. As I made my way west on the I-10, still some 40 miles from my destination, a place I've never been, and the sky began to slowly lighten, it became evident that I was probably going to miss another sunrise.

It was only then when I recognized a familiar anxiety, which shouldn't exist, yet an anxiety that creeps in almost every time I decide to make one of these personal photo trips. Why do I put any kind of pressure on myself and why does it matter if I miss the sunrise? Am I really missing the sunrise if I'm watching it with my eyes? Do I have to actually capture the sunrise in a photograph in order to alleviate the anxiety? These are the questions I struggle with.

During the middle of the day I had a great time exploring a section of the national park called Jumbo Rocks. Lots of fun climbing around the granite rock formations in search of interesting shapes. I thought the light wrapping around this particular boulder which was balancing on an even bigger boulder made a nice composition. Choosing to convert to monochrome during post  processing helps to focus on that composition as does using a red filter, which turns the blue sky almost black. Fujifilm X-Pro2 with a Fujinon XF 35mm f2 R WR, 1/900 @ f8.0, ISO 200.

The strange thing is that I rarely feel this kind of anxiety when I'm on a paid assignment, like the one I just finished the day before. I feel pressure for sure, but somehow it's not the same. I've reflected on this before, this feeling that I have to get a remarkable image or somehow the trip was a waste.

Of course, the reality is that I normally come back from all of these trips with at least some photographs that I'm proud of. What I am certain of though is that I do return from these trips with memories of a great experience. Maybe that is more of the point.

I kept noticing how these lines of a different type of rock  made their way through the giant granite formations. In this case, I used the line to lead the viewer into the photo. Fujifilm X-Pro2 with a Fujinon XF 35mm f2 R WR, 1/680 @ f11, ISO 200.

I'm fortunate that I get paid to take photographs. And I'm also fortunate that I get to travel in pursuit of those photographs. And when I can extend that trip in order to experience a new location with my camera, I try to take full advantage of it.

One of the best things about photographing during the winter months is that the sun sets early enough that there is still plenty of time for dinner. What is difficult, however, is with close to 800,000 acres of land, how do you find the perfect spot to photograph that sunset in Joshua Tree National Park. During my travels through the park earlier in the day, I found a section with a lot of trees, so I returned to that spot and after about 20 minutes of walking around as the sun dropped behind a distant mountain, I found a nice composition and made my final photo of the trip. Fujifilm X-Pro2 with a Fujinon XF 16mm f1.4 R WR, 1/60 @ f9.0, ISO 200.

Sometimes on these personal trips, I just need to remind myself to slow down, realize that there is not a deadline and that there is not an editor waiting for the results. These trips are about me and my camera and capturing memories. And sometimes when I miss that photo of a sunrise, I need to remind myself that I still had the experience and know that I'm fine with that.

HOW DID YOU SEE THAT?

Fujifilm x-Pro2 with a 35mm lens. 1/140 @ f7.1, ISO 800, exp. comp. -1.0. Processed in Adobe Lightroom CC (2015) and Nik Color Efex Pro.

It was my first night in Scotland for an assignment with the Navy. I had left Washington, D.C. the previous evening, arrived at Inverness via Heathrow around noon, and after another three hours of driving, I arrived in the Kyle of Lochalsh and the British Underwater Test & Evaluation Centre where I received an overview of the location where I would be shooting for the next week.

After finishing up and checking into my lodging, I began to explore the small town in search of dinner and a Pint and maybe a few photographs. The sun was already beginning to set and a nice color began to fill the sky.

Forgetting about dinner, and especially the Pint, for a moment, I made my way to an overlook and saw a really nice scene of the Skye Bridge with the sun setting in the distance. In the foreground was the Kyle of Loch Alsh Hotel. More on that later.

I made my way closer and immediately spotted some great rocks covered in green and yellow lichen located just beyond the hotel. I knew right away that those rocks would make a great foreground and a few minutes later I was happily shooting.

Why the title of this blog?

Well the next day several people who had already been in Scotland for a few days, and spotting a photographer now on site, approached to see if I had witnessed the previous night's sunset, eagerly sharing some very nice photos they had taken.

I told them that I too had taken a few photos and showed them one that I had transferred to my phone. They immediately began to complement me and wonder where I took that photo and how cool the colors were, especially in the foreground. They didn't believe me when I told them.

The first view of the setting sun I had before making my way past the hotel to the rocks.

You see, they were all staying at the Kyle of Lochalsh Hotel and photographed that same sunset just 50 yards from where I made my photograph. In fact, they had been there for several nights and never noticed those rocks.

The point of this post isn't to brag that I got a better photograph, that's subjective. In fact, throughout the week I found myself wondering the same thing about a British and Canadian photographer covering the same assignment as I was.

We all see things differently and this was another reminder to look around, not give up on a scene too early and that sharing your work is important to both show others what they might have missed and to show you what you missed. 

And maybe those who saw my version of that sunset looked at something differently over the next couple days. I know I did.


ASSATEAGUE, CHINCOTEAGUE - HORSES OR PONIES?

Chincoteague Ponies. 1/1600 @ f5.6, ISO 400. Nikon D4S, 300mm 2.8 with 2x teleconvertor.

Chincoteague Ponies. 1/1600 @ f5.6, ISO 400. Nikon D4S, 300mm 2.8 with 2x teleconvertor.

For a couple of years, I've had Assateague and Chincoteague on my photographic trip list and with a few days off I finally decided to make it a reality. But first, I was a little confused about the difference between the two locations.

I'll try and break it down. The whole island is Assateague and is located in both Virginia and Maryland. The Chincoteague National Wildlife Refuge is on Assateague Island but located in Virginia. Assateague Island National Seashore is located in Maryland and is a U.S. National Park. 

Well, are they horses or ponies? Apparently they are referred to as Assateague Horses and Chincoteague Ponies, although they really are all ponies due to their size. At the Assateague National Seashore, the horses are free to roam while on the Chincoteague National Wildlife Refuge they are penned in and not free to roam Assateague Island. Confused?

It really doesn't matter because both locations should be on your trip list and I saw plenty of horses, or should I say ponies, in both locations as well as plenty of other wildlife and many great locations to photograph during a day and a half visit.

Assateague sunset. 1/10 @ f20, ISO 200. Nikon D4S, 14-24mm at 14mm.

Assateague sunset. 1/10 @ f20, ISO 200. Nikon D4S, 14-24mm at 14mm.

I arrived at Assateague National Seashore around noon and spent the remainder of the day taking short hikes, scouting locations, and of course stalking horses. One thing I noticed after crossing the bridge to the island and before I arrived at the park entrance was how close the marsh was to Bayberry Drive and that in several spots there was room to pull over. I knew then that it would be a great place to photograph the sunset.

And it was at one of these spots that I took the photograph above. Setting my tripod low in order to emphasize the foreground I was drawn to the green plant life in the water as well as the interesting pattern created by the marsh itself. This all came together and It actually makes this a much better photo despite what turned out to be a mediocre sunset.

Assateague Horses. 1/2000 @ f5.6, ISO 400. Nikon D4S with a 300mm 2.8 and 2x teleconverter.

Assateague Horses. 1/2000 @ f5.6, ISO 400. Nikon D4S with a 300mm 2.8 and 2x teleconverter.

I spotted these horses while on the Life of the Marsh trail which is a short loop boardwalk trail located off of Bayside Drive. And it's a good thing it was short because initially I only had the 80-400mm lens with me when I first spotted them so I returned to my car and retrieved a 300mm lens and 2x teleconverter to get this shot.

I like the two pools of water in the foreground marsh which adds some depth and helps bring you into the frame. These horses and ponies spend a lot of time with their heads in the grass eating, so patience and timing are needed in order to catch even one of them looking up. 

Chincoteague sunrise. 1/640 @ f5.3, ISO 200. Nikon D4S, 80-400mm at 195mm.

Chincoteague sunrise. 1/640 @ f5.3, ISO 200. Nikon D4S, 80-400mm at 195mm.

Chincoteague is about one and a half hours drive from Assateague so it is possible to photograph them both in a single day, at least during this time of year. Or, as I found out if you "camp" in Walmart parking lots, spending half the night in Fruitland, Maryland, and half the night in Ocean City, Maryland, it is a much longer trip than it should be and because of that, I almost missed the sunrise. Next time I'm camping on the beach in the National Park or staying in a hotel on Chincoteague Island, both better alternatives.

One tip I read prior to the trip is that if you wanted to see the ponies on Chincoteague you should drive along Beach Road until you come to a section where marsh is on each side and there is ample room to pull over. Ponies will be to the right, but I found it to be a great spot to catch the sun rising over Swans Cove Pool on the left. This tip saved the day and my sunrise shots.

Swans Cove Pool, Chincoteague. 1/800 @ f5.6, ISO 400. Nikon D4S with a 300mm 2.8 and 2x teleconvertor.

Swans Cove Pool, Chincoteague. 1/800 @ f5.6, ISO 400. Nikon D4S with a 300mm 2.8 and 2x teleconvertor.

After the sun cleared the horizon, I began to focus on the various birds that were gathering in the foreground. There was still some great warm light coming from behind the birds, so I just waited for them to take flight and used that strong backlight to ensure separation from the background.

Assateague Lighthouse. 1/340 @ f5.6, ISO 200, exposure compensation +0.7. Fujifilm X-Pro2 with a 35mm (50mm equivalent).

Assateague Lighthouse. 1/340 @ f5.6, ISO 200, exposure compensation +0.7. Fujifilm X-Pro2 with a 35mm (50mm equivalent).

One thing I always consider after choosing a photo destination is how I will spend the middle of the day. It could be a nap, long lunch, exploring the visitor center, or scouting locations, but on Chincoteague, it was the Assateague Lighthouse that captured my attention.

Sometimes a scene just presents itself and as entered the small clearing following a very short hike, I was immediately struck by the geometric patterns of the buildings and tower, the contrast between the white trim and red body and the light and shadows created by the surrounding trees. I also knew that this would look great in black and white.

Assateague beach. 1/250 @ f2.8, ISO 200. Fujifilm X-Pro2 with a 35mm (50mm equivalent).

Assateague beach. 1/250 @ f2.8, ISO 200. Fujifilm X-Pro2 with a 35mm (50mm equivalent).

The other thing I did during the middle of the day was to explore the beaches, or more accurately, set up a chair and just enjoyed the sounds and smells of the ocean. You could probably spend most of the day photographing the sand dunes and the birds along the coast. I only took a few photos along the beach but liked the subtle texture and slight warmth of this image.

Do yourself a favor and visit Assateague Island, enjoy the beaches, wildlife, and the beautiful sunsets and sunrises, but I would suggest you do it during the off-season.

PHOTOGRAPHING INTO THE SUN

This photograph which was taken one hour before sunset exhibits typical lens flare that causes artifacts usually in the shape of the iris. Lens flare is more common when using a zoom lens. ISO 200, f11 @ 1/500, with a Nikon 70-200 2.8 at 200mm.

This photograph which was taken one hour before sunset exhibits typical lens flare that causes artifacts usually in the shape of the iris. Lens flare is more common when using a zoom lens. ISO 200, f11 @ 1/500, with a Nikon 70-200 2.8 at 200mm.

Light is the key to photography and as we continue to chase that light, more often than not we find ourselves out during the golden hour; that wonderful time around sunrise and sunset. However, after it has risen or while waiting for it to set, we rarely point our cameras in the direction of the sun and that's a shame.  

During two recent visits to Shenandoah National Park, I found myself embracing the idea of pointing my camera into the sun and came away with some beautiful results. 

This photograph was taken one hour after sunrise from high above the valley backlit by the sun. The light shining through the early morning fog gives this image a soft, ethereal feel. ISO 200, f22 @ 1/400 with an Nikon 80-400 4.5/5.6 at 400mm.

This photograph was taken one hour after sunrise from high above the valley backlit by the sun. The light shining through the early morning fog gives this image a soft, ethereal feel. ISO 200, f22 @ 1/400 with an Nikon 80-400 4.5/5.6 at 400mm.

One reason, of course, you might avoid shooting in the direction of the sun is lens-flare, but perhaps that is the exact reason you should keep shooting. Traditional we have been told that lens-flare is a mistake, something to avoid, but more and more I'm seeing it used as an artistic effect. I believe it can add an authenticity to a photograph, almost like you did make a mistake, as if you suddenly turned around, grabbed your camera and fired off a frame.

Another reason that you might avoid shooting in the direction of the sun is that it tends to produce flat, monochromatic images. However, it is just that lack of contrast that can give a photograph an otherworldly or ethereal feeling. A sense of being overexposed, but in a good way. 

The sun, just out of the frame at right one half hour before sunset produced this unexpected pinkish hue. Shooting into the light can often result in flat, monochromatic images. ISO 200, f4.5 @ 1/80, with a Nikon 300 2.8.

The sun, just out of the frame at right one half hour before sunset produced this unexpected pinkish hue. Shooting into the light can often result in flat, monochromatic images. ISO 200, f4.5 @ 1/80, with a Nikon 300 2.8.

Don't get me wrong, sometimes lens-flare and flat imagery is not desired, otherwise we could all throw away our lens shades and only purchase inexpensive zoom lenses and place cheap filters on them. 

Keep in mind a few things when shooting into the sun. Use live view instead of looking through your DSLR camera, especially with a long lens. Set your camera to manual mode, both exposure and focus, so you control the effect, otherwise the camera will try to compensate for your "mistake."  

So the next time you are waiting for the sun to set or turning your attention elsewhere after the sun has risen, keep shooting. And if you quickly dismiss a photo because of lens-flare while editing, go back and take another look, you might be surprised.

PHOTOGRAPHING SUNRISE AND SUNSET - SO WHAT

Mitchell Butte sunset in Monument Valley, Arizona. Nikon D3S, 1/15 @ f 4.
The sun sets behind Mitchell Butte in Monument Valley, Arizona, December 2012. Nikon D3S, 1/15 @ f 4.
What am I talking about? I don't want to come off as being anti sunrise or sunset mind you, in fact I enjoy them as much as anyone else. For some reason though, I just don't like photographing them.

Maybe that's a bit of an overstatement, because I do, and have shot them, I mean who doesn't. I talk about light all the time and like most photographers am a big fan of early morning and late afternoon light. In fact, didn't I just write about light in my previous blog post?

And in order to get that great light you normally have to be at a location before the sun comes up and stay after the sun goes down. So naturally you see a lot of sunrises and sunsets.

So why do I dislike photographing them?

Site of the Battle of the Wheatfield at Gettysburg, Pa. Nikon D1H, 1/16 @ f16.
Sunset at the site of the Battle of the Wheatfield, Gettysburg, Pennsylvania, November 2002. Nikon D1H, 1/16 @ f16.
Here it is. It never fails. I'll be showing my photographs to family and friends (normally non-photographers) and the one photograph that elicits the biggest response, tops all others, brings the viewer to their knees is... you guessed it, the sunrise or sunset photo. And I don't know why. Is it because they are so colorful, iconic, romantic, or just harder to capture then I think?

By this point you may be wondering if I'm joking. I'm just wondering how I'm going to finish this blog. Maybe the best way is to get over it, embrace the beauty of it all. Or better yet, maybe I could offer five tips on photographing the rising and setting sun.

Sunrise on the Sassafras River off of the Chesapeake Bay. Fuji X100S, 1/450 @ f2, exp. comp. -1.0
Sunrise on the Sassafras River off of the Chesapeake Bay, September 2013. Fuji X100S, 1/450 @ f2, exp. comp. -1.0
Here it goes.

1. Turn around. You know that golden light falling on the pond or barn or whatever, well it is coming from somewhere and that somewhere is normally behind you. I've been shocked a few times when I think the light is gone only to turn around and see something amazing.

2. Underexpose. Setting your camera to underexpose the scene by a stop or so will deepen the colors and minimize overexposure of any bright spots. I would also recommend shooting RAW so you have some extra exposure latitude when post processing.

3. Mind your foreground. Putting something interesting in the foreground adds interest and can separate your sunset or sunrise photograph from all the others. Come to think of it, I do like some of my photos when I've incorporated a strong foreground.

4. Wide is fine but think tight. While a wide angle lens can emphasize the grandness, choosing a long lens compresses the scene and if you paid attention to tip number three, then the foreground subject becomes that much more interesting.

5. Bracket, bracket and bracket. You can follow tip number two, but really if there was ever a time to bracket, now is that time. But be mindful of your time, because before you realize it the sun will have risen or set.

Early morning duty in Guantanamo Bay, Cuba. Nikon D1H, 1/4000 @ f6.3, exp. comp. - 0.3.
Early morning duty in Guantanamo Bay, Cuba, May 2003. Nikon D1H, 1/4000 @ f6.3, exp. comp. - 0.3.
So will I stop shooting sunrises and sunsets? No, of course not. Would I prefer to just sit there and enjoy them, probably, but I'm a photographer after all.